
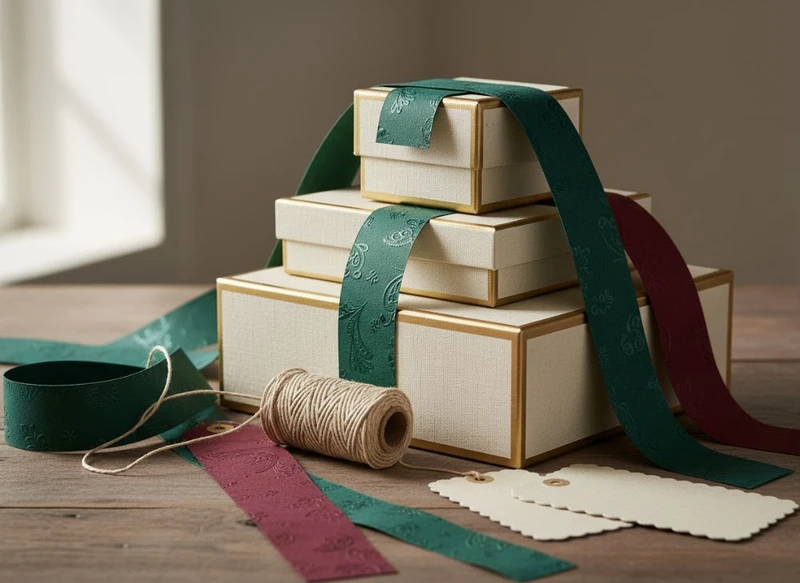
Creating luxury gift packaging with budget-friendly paper boxes and labels is mainly about controlling what customers see and touch first. A sturdy, well-proportioned paper box, a limited colour palette, crisp label placement and one carefully selected premium detail can look far more considered than an over-decorated pack with expensive materials.
Rather than adding every possible finish, choose a packaging hierarchy: invest in the box structure and opening experience, then use stickers, tissue paper, inserts and tags to create contrast, protection and brand recognition. This approach helps Australian retailers, e-commerce teams and product developers build a premium presentation while keeping components practical to source, pack and replenish.
The Secret to High-End Cardboard Boxes
A premium-looking cardboard box does not need complex printing or multiple decorative treatments. It needs clean construction, appropriate board strength and proportions that suit the product closely.
Start by selecting a box style that supports the way the gift will be handled, displayed and opened. A rigid-style presentation box may create a formal reveal, while a folding carton can be more efficient for products that need to be stored flat before packing. The right choice depends on product weight, fragility, order volume and the desired unboxing experience.
Key factors that affect perceived quality include:
- Fit: A box that is excessively large can make even a quality product feel under-presented. Allow enough room for protective material without leaving the item loose.
- Board choice: The board needs to hold its shape through packing, handling and storage. Confirm the suitable material and thickness with your packaging supplier based on the product’s weight and dimensions.
- Edges and folds: Sharp creases, aligned corners and neat glue areas contribute strongly to a refined appearance.
- Surface finish: Matte surfaces often feel understated and contemporary. Gloss can create contrast or make colours appear more vivid, but it may also show fingerprints more readily.
- Print restraint: One or two carefully chosen colours can look more luxurious than a crowded, full-panel design.
For products requiring a tailored format, custom printed boxes make it possible to match the internal dimensions, branding space and opening style to the item. Before approving production, check both the internal and external measurements. Internal dimensions affect product fit; external dimensions influence shelf space, outer packing and freight planning.
A useful budget principle is to place the visual focus on one face of the box—often the lid or front panel—rather than applying decorative elements across every surface.
Using Custom Inserts for a Premium Feel
An insert can make a straightforward paper box feel purpose-built. It holds the product in place, separates components and makes the opening sequence more deliberate.
Paperboard inserts are often a sensible starting point because they can be printed, die-cut and designed to suit many product shapes. A folded insert may support a lighter item, while a more structured design can help present multiple pieces in a fixed arrangement. For delicate items, the insert should be assessed alongside the outer transit packaging rather than treated as the only protective layer.
When specifying an insert, consider:
- Product position: Decide whether the product should sit flat, stand upright or be revealed in layers.
- Clearance: Allow for product variation, wrapping, caps, cords, accessories or instruction cards.
- Removal: A tight fit may look neat but can frustrate the recipient. Add finger holes, pull tabs or open edges where appropriate.
- Material compatibility: Check whether the product surface could be marked, scratched or affected by friction against the insert.
- Assembly time: Highly intricate inserts can add packing steps. Choose a design your team can assemble consistently.
Custom inserts also create opportunities for quiet branding. A short message beneath the product, a tonal pattern or a single printed instruction can reward the recipient without overwhelming the exterior. Keep any text legible under the lighting likely to be used at home or in a retail environment.
Avoid designing an insert solely from a digital product rendering. Use a physical sample or accurate prototype to confirm fit, removal and visual balance.
Elevating Simple Designs with a Gold Foil Sticker
A gold foil sticker can provide a high-end accent without requiring foil across the entire box. It works particularly well on uncoated or matte paper surfaces, where the contrast between a soft background and metallic detail is easy to notice.
Use foil stickers as a focal point, not a substitute for an unclear visual identity. A small logo seal, monogram, collection name or tamper-evident closure can be enough. The best result usually comes from leaving generous clear space around the sticker.
Consider these details before choosing a foil label:
| Decision point | What to consider |
|---|---|
| Sticker size | Ensure fine lettering remains readable and the label does not dominate the pack. |
| Foil tone | Compare warm gold, pale gold and other metallic tones with the box colour under normal lighting. |
| Adhesive surface | Test adhesion on the final box coating, textured stock and any curved or folded areas. |
| Artwork detail | Very small type, thin lines and intricate patterns may not reproduce clearly. |
| Application method | Confirm whether labels will be applied by hand or with equipment, then allow enough placement tolerance. |
Gold foil is not the only route to a premium effect. A black label on a soft-coloured box, a textured white label on deep colour, or a single metallic ink detail can be equally effective. The key is deliberate contrast.
For designs involving product seals, brand labels or campaign stickers, explore custom sticker options and request guidance on size, material, finish and artwork requirements. Always review a physical sample where the label will be used, particularly if it must adhere to textured, coated or recycled-content paper.
Choosing the Right Box Closure (Ribbon, Magnetic)
Box closures influence both the perceived value and daily usability of gift packaging. The most impressive closure is not always the right commercial choice; it needs to suit the product, assembly process and expected reuse.
Ribbon closures
Ribbon can make a simple box feel ceremonial and works well for limited editions, seasonal gifts and personalisable packs. It adds softness to an otherwise structured format and gives recipients an obvious opening action.
However, ribbon requires time to thread or tie, may become creased in storage and can create variation when applied manually. Choose a ribbon width that matches the scale of the box, and make sure knots or bows do not obstruct labels, barcodes or required product information.
Magnetic closures
Magnetic-close boxes can offer a clean, satisfying opening and a reusable keepsake feel. They suit premium presentation where the product remains in its box after purchase.
They can also involve a more complex structure than a basic folding carton. Confirm how the box will arrive, whether it is supplied flat or assembled, how it will be packed, and whether the closure remains aligned when filled. Consider the suitability of magnetic elements for your product category and distribution requirements before finalising the design.
Other practical closures
Sleeves, tuck flaps, seals and belly bands can create a polished result with fewer components. A printed paper belly band is especially useful when you want to refresh campaign messaging or seasonal branding without changing the underlying box.
Choose the closure based on its job:
- For quick packing: tuck closure or self-adhesive seal.
- For a gift-like reveal: ribbon, sleeve or belly band.
- For repeat opening: structured lid or magnetic-close format.
- For tamper indication: seal label or a closure designed for one-time opening.
Do not assume a closure alone provides adequate security in transit. Retail presentation packaging and shipping protection often need to work as separate layers.
Design principles used in premium gift packaging
Luxury presentation is generally created through clarity and consistency, not by using the most decorative option available. Apply a small number of design principles across the box, insert, label and printed collateral.
Build a clear visual hierarchy
Decide what the recipient should notice first, second and third. Usually this means the brand mark or collection name first, the product descriptor second and supporting information after that. If every element is large, metallic or colourful, nothing has priority.
Limit the colour palette
A controlled palette makes packaging feel cohesive. One dominant base colour, one text colour and one accent are often enough. If you use a metallic label or foil element, reduce other visual effects so that it remains special.
Use typography with discipline
Choose typefaces that suit the product position and remain practical at small sizes. Use a small number of type styles, establish a consistent spacing system and avoid placing essential information too close to folds, corners or closure lines.
Create tactile contrast
A premium feel is often tactile. Pair a matte box with a smooth foil sticker, a soft tissue wrap with a crisp gift tag, or a textured label against a flat printed panel. Before committing, check that the materials can be packed without scuffing, transferring colour or losing adhesion.
Leave room to breathe
Blank space is not wasted space. It gives the logo, label and product name more impact while helping the package look intentional. This is particularly valuable for small boxes, where too much artwork can quickly feel cramped.
Design for the full journey
Review the design at each point: unassembled, packed, opened, photographed, displayed and disposed of or reused. A beautiful box may lose its effect if the label crosses a fold, the ribbon shifts in handling or the insert makes the product difficult to remove.
Check all mandatory product labelling, safety information and market-specific requirements applicable to your category before printing. Decorative packaging should never obscure information that must remain visible.
The Role of Tissue Paper and Gift Tags
Tissue paper and gift tags are low-material additions that can substantially improve the opening experience. They also help transform a standard box into a complete gift presentation.
Tissue paper provides a soft first layer between the lid and product. Choose a colour that supports the rest of the palette rather than competing with it. Plain tissue can appear more refined than heavily printed tissue, especially where the box already carries strong branding.
Use tissue paper carefully:
- Select a size that wraps the product without excessive bulk.
- Avoid very dark colours where colour transfer could be a concern.
- Test the appearance after the tissue has been folded, compressed and reopened.
- Consider whether staff can wrap it consistently at the required packing pace.
- Ensure it does not hide important product directions or loose components.
Gift tags create a place for a short message, product story or personal note. They are especially useful for gift bundles, product launches and retail-ready sets. A simple uncoated tag, tied with cord or fixed under a belly band, can add texture at modest cost.
Keep gift-tag copy brief. A product name, a short thank-you line or a care prompt is more effective than a crowded paragraph. If variable information is needed, such as a recipient name or batch detail, plan the workflow before choosing the tag format.
For coordinated formats including boxes, wraps and presentation extras, gift packaging options can help inform the components you need to specify as one system.
Focus on Detail: Precision in Label Sticker Placement
A label placed a few millimetres off-centre can weaken an otherwise polished package. Precision matters because customers naturally use labels and seals as visual reference points.
Set placement rules in the packaging artwork and packing instructions. Rather than telling packers to “centre the label”, specify measurable alignment points, such as the distance from an edge, a panel seam or a printed guide. If guides are not appropriate on the finished pack, use a packing jig or template where practical.
Before production or a major campaign run, check:
- The label is centred on the intended panel, not just visually centred on an assembled box.
- The label does not cross a fold, crease, cut-out or closure edge.
- The adhesive suits the final substrate and coating.
- Barcodes, instructions and mandatory declarations remain unobstructed.
- The label can be applied consistently by the chosen process.
- Placement still looks correct if the box has slight normal variation in folding or assembly.
Round seals can be forgiving because minor rotation is less obvious. Rectangular labels, fine borders and horizontal typography demand more accuracy. If hand application is necessary, choose a label shape and design that tolerate small variation rather than relying on exceptionally precise placement every time.
A common mistake is treating the label as an afterthought. Include it in the initial box artwork review, mock-up and packing trial so its size, location and finish feel integrated.
How to Price Your Premium Gift Packaging
Pricing premium gift packaging should account for the complete landed packaging cost and the commercial value it creates—not only the quoted unit cost of the box.
Begin with a component-level estimate:
- Outer box
- Insert or divider
- Labels, seals or foil stickers
- Tissue paper, ribbon, tags and sleeves
- Printed cards or instructions
- Assembly and packing labour
- Sampling, artwork preparation and any tooling requirements
- Outer shipping materials needed to protect the presentation pack
- Storage space, stockholding and likely wastage
Then identify which components genuinely improve the customer experience. A high-cost finish may be worthwhile for a special release or gift-with-purchase, but unnecessary for an everyday product range. Conversely, an appropriately sized box and reliable insert may be worth prioritising because they protect the product and improve presentation at the same time.
Use a tiered packaging approach
A practical way to manage costs is to develop two or three packaging tiers:
| Tier | Suitable use | Typical approach |
|---|---|---|
| Core presentation | Everyday giftable products | Printed paper box, one branded label and tissue wrap |
| Elevated edition | Launches, bundles or selected retail lines | Improved insert, foil seal, gift tag or sleeve |
| Signature gift set | Seasonal or high-value offers | Structured box, tailored insert and carefully selected closure details |
This approach lets teams preserve visual consistency while reserving more involved components for occasions where they support the product margin and customer expectation.
Compare total cost, not only unit cost
A lower-cost box can become more expensive if it takes longer to assemble, requires additional void fill or has a high rate of packing inconsistency. Similarly, a more structured box may justify its cost when it reduces the need for separate presentation materials.
Ask suppliers to clarify what is included in the quote, such as materials, printing, finishes, tooling, samples, packing format and any minimum order quantities. Confirm specifications in writing and compare like-for-like proposals before making a decision.
Avoid committing to a large quantity based only on a screen proof. Review a physical prototype with the actual product, labels, insert and tissue where possible. This step can reveal fit issues, colour differences and assembly problems before they affect a broader order.
A practical specification checklist
Before requesting quotes or approving artwork, prepare the following information:
- Product dimensions, weight and any fragile or irregular features
- Required internal box clearance
- Preferred box style and opening direction
- Desired paper or board appearance and finish
- Print colours, logo files and artwork placement
- Insert design and product retention needs
- Label size, material, finish and application position
- Tissue, tag, ribbon or sleeve requirements
- Assembly method and who will pack the finished product
- Quantity, replenishment expectations and available storage space
- Applicable product labelling and compliance checks for the Australian market
A focused packaging brief will help suppliers propose suitable options and will make comparisons more accurate. XGolden Print offers custom packaging and printing solutions, and its company background may be useful when assessing a packaging partner alongside your own specification and sample review process.
The strongest budget-conscious luxury packaging usually has a simple formula: a well-fitting paper box, one tactile or metallic detail, tidy internal presentation and precise finishing. Start with the product fit and opening experience, then add only the elements that clearly improve the result.
