
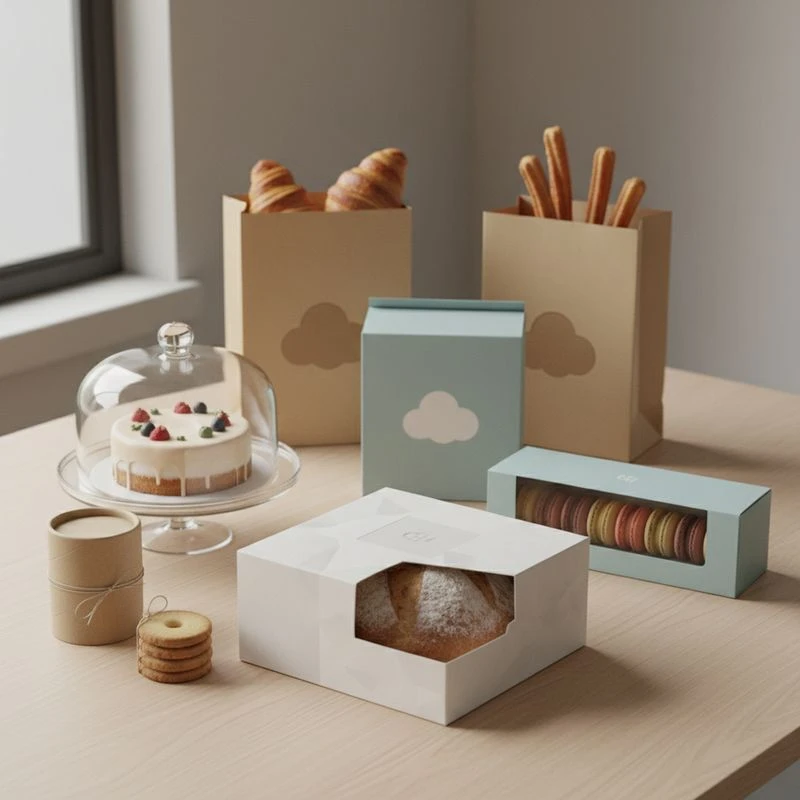
Custom packaging for bakery and confectionery products should do four jobs at once: protect the item, support food-safe handling, present it attractively and work efficiently across packing, retail or delivery. The right format depends on the product’s fragility, moisture and grease content, shelf life, display needs and how customers will carry it home.
For Australian brands, the most reliable approach is to specify the product first, then select board, inserts, windows, printing and closure features around its real handling conditions. A visually appealing box is valuable, but it must also remain practical for food contact, transport, stacking and service.
Bakery Packaging
Bakery packaging needs to preserve shape and presentation without trapping excess moisture or allowing grease to compromise the carton. A box suitable for crisp biscuits may be unsuitable for a frosted cake, warm pastry or cream-filled product.
Start by grouping products according to their packaging needs rather than trying to use one box style for every range.
| Product type | Common packaging priorities | Suitable format considerations |
|---|---|---|
| Cakes and cupcakes | Protection from crushing, stable base, room for decoration | Rigid or folding cake boxes, fitted inserts, tall lids and secure closures |
| Biscuits and slices | Portion control, neat presentation, moisture management | Cartons with trays, sleeves, tuck-end boxes or compartment inserts |
| Pastries and doughnuts | Grease resistance, ventilation where needed, easy service | Grease-conscious board choices, hinged boxes, trays or window cartons |
| Macarons and petits fours | Separation, delicate handling, gift appeal | Compartments, trays, snug inserts and premium printed cartons |
| Bread and baked loaves | Product visibility, freshness considerations, easy carrying | Bags, sleeves, cartons or windowed boxes selected for the product’s storage needs |
| Seasonal gift assortments | Strong branding, presentation, mixed-product protection | Two-piece boxes, drawers, sleeves, dividers and printed gift packaging |
Match the box dimensions to the packed product
A carton that is too large lets products slide, collide and lose their finish. One that is too tight can damage icing, coatings or delicate edges during packing. Measure the fully finished product, including toppings, decorative picks, liners and inserts.
When preparing dimensions, confirm:
- internal length, width and height rather than external dimensions alone;
- whether the product will sit in a tray, cup, liner or mould;
- clearance required above icing, chocolate decorations or labels;
- the number of units per pack;
- whether an insert needs finger space for easy removal;
- how cartons will be stacked before sale or dispatch.
For multipacks, a simple divider can prevent chocolate pieces, macarons or cupcakes from moving into one another. However, inserts add material, packing time and dimensional complexity, so they should solve a genuine handling problem.
Consider heat, grease and moisture early
Bakery and confectionery products interact with packaging in different ways. Butter-rich pastry, chocolate, fondant, caramel, cream and warm baked goods can all influence the most appropriate material structure.
Ask practical questions before approving a format:
- Will the product be packed warm, cooled or chilled?
- Is it oily or likely to transfer grease?
- Could condensation form after packing?
- Is the product brittle, soft, sticky or easily smudged?
- Will it be displayed upright, stacked flat or carried in a bag?
- Does the pack need ventilation, a liner or an additional sealed wrapper?
Avoid assuming that a heavier board automatically resolves food or performance concerns. Board weight, coating, print finish, folding style and the product’s storage conditions all matter. Any barrier or material intended to contact food should be assessed for that exact use.
Build efficiency into the pack design
A beautiful carton can become costly or frustrating if it is slow to assemble during a busy production run. For counter service and high-volume packing, look for practical features such as pre-glued construction, intuitive folds, easy-open tabs and straightforward insert placement.
Before committing to a design, review the packing sequence:
- Assemble the carton or tray.
- Place any liner, insert or divider.
- Load the food product without touching printed or unsuitable surfaces.
- Close and secure the pack.
- Apply labels, date coding or tamper-evident elements if required.
- Place packed units into outer cartons for storage or delivery.
This process often reveals small issues that are not obvious from a flat artwork file, such as a lid catching on an insert or a window panel flexing too easily.
Food Safe
Food-safe packaging is not simply a label or a material name. It is a combination of the packaging components, the food type, the intended contact surface, storage time, temperature, inks, coatings, adhesives and production controls.
For bakery and confectionery packaging, businesses should verify that materials intended to touch food are appropriate for their specific use in Australia. This is particularly important where food is greasy, acidic, moist, hot, chilled, frozen or stored for an extended period.
Specify the food-contact arrangement
Clearly identify whether the printed carton is:
- in direct contact with the food;
- separated from the food by a bag, wrap, tray, cup or liner;
- used only as an outer presentation carton;
- intended for short counter-service use; or
- designed for retail display or longer storage.
This distinction affects the material and finishing choices that may be suitable. For example, a carton holding a sealed bag of lollies has a different contact arrangement from a tray holding unwrapped biscuits.
Do not presume that an attractive finish is suitable for direct food contact. Discuss food-contact requirements with the packaging supplier, and ensure the final specification addresses the board, inks, coatings, adhesives, window film and any inserts or liners involved.
Check packaging compatibility, not just appearance
A practical specification should cover the full pack system. Confirm:
- the food categories and product ingredients that may affect compatibility;
- whether packaging touches the food directly or indirectly;
- expected storage temperature and humidity;
- whether products may be refrigerated, frozen or warmed after packing;
- the side of the board that faces the food;
- the role of any paper liner, plastic film, foil or tray;
- whether print, varnish, foil or glue could sit near a contact area;
- batch identification, date marking and label placement requirements.
If you are introducing a new product, flavour, filling or coating, review the packaging again. A change from dry confectionery to oil-rich or filled confectionery can alter the pack’s requirements.
Plan for hygiene in the packing area
Packaging design supports hygiene, but it does not replace food-handling controls. Keep packed and unpacked stock clearly separated, and select a design that workers can assemble and fill without unnecessary handling.
Useful design choices may include:
- cartons that open wide for clean loading;
- inserts that hold individual pieces apart;
- lids that close without contacting toppings;
- outer sleeves that allow a tray to slide in;
- labels applied to a designated flat panel rather than over a closure.
Where tamper evidence is needed, determine whether it will be provided by a label, seal, shrink band, sealed inner wrap or another feature. The best option depends on the product, sales channel and customer experience you want to create.
Window Boxes
Window boxes let customers see cakes, biscuits, chocolates and gift assortments before purchase. They can be especially useful when colour, decoration, hand-finishing or variety is central to the product’s appeal.
A window is not always the right answer, however. It introduces another material component and can affect carton strength, recycling considerations, packing speed and the area available for printed messaging.
When a window box is useful
Windowed bakery packaging is often a strong choice when customers benefit from seeing:
- cupcake decorations or cake finishes;
- the variety in an assorted confectionery box;
- the texture and colour of handmade biscuits;
- a premium arrangement of macarons or chocolates;
- seasonal gift products with visual appeal.
A window can reduce the need for extensive product photography on the carton while helping staff and customers identify the contents quickly.
Choose the window style carefully
The shape and placement of the window should support the product rather than dominate the design. A long side window may show a row of pastries, while a top window can suit cakes, cupcakes and assorted gift boxes.
Consider these trade-offs:
| Window choice | Potential benefit | Points to verify |
|---|---|---|
| Top window | Gives a clear overhead product view | Lid strength, clearance over decorations and glare under retail lighting |
| Side window | Shows product profile and layers | Protection during stacking and visibility when displayed on shelves |
| Full-panel window | Creates strong visual impact | Structural support, material use and adequate printed space |
| Small shaped window | Adds brand character while retaining board area | Whether the view is sufficient for product identification |
| No window | Maximises print space and carton structure | Need for accurate imagery, product descriptions or labels |
Window film, its attachment method and the box material should be considered as one system. Confirm suitability for the intended food-contact arrangement, storage environment and end-of-use requirements. If recyclability messaging is planned, ensure it reflects the actual final pack construction and local collection conditions rather than assumptions.
Protect the view customers expect
A window only works when the product remains presentable. Loose chocolates, smeared icing or crushed biscuits can undermine the purpose of a transparent panel. Use trays, cavities, liners or dividers where necessary to keep the food positioned.
For products likely to develop condensation, test the intended pack under realistic cooling and storage conditions before a full run. A clear window can make moisture more visible, so product temperature and packing timing deserve particular attention.
B2B Printing
B2B bakery packaging printing should be managed as a specification process, not just an artwork exercise. Procurement teams, product developers and brand owners need a documented brief that aligns product protection, brand presentation, operational handling and reorder consistency.
The most useful print brief explains what the packaging must achieve before it describes colours or embellishments.
Create a practical packaging specification
Include the following information when requesting custom bakery or confectionery packaging:
- box style and finished internal dimensions;
- flat-pack or pre-assembled delivery preference;
- product type, unit count and packed weight where relevant;
- direct or indirect food-contact arrangement;
- board, window, insert, liner and closure requirements;
- print areas, number of colours and artwork placement;
- logo files, brand colours and any required finishes;
- barcode, ingredient, allergen, date code or batch-code space where applicable;
- outer carton packing requirements;
- expected order quantities and reorder needs;
- samples or prototypes required before final approval.
This detail helps prevent avoidable issues such as a barcode wrapping around a corner, a design sitting too close to a fold line or an insert not fitting the selected carton.
Understand print and finish choices
Different print approaches and finishes suit different priorities. The right choice depends on artwork complexity, order volume, packaging substrate and the desired visual effect. Rather than choosing based on appearance alone, ask how each option may affect colour consistency, lead times, minimum quantities, durability and cost.
Common presentation choices include:
- Single-colour or limited-colour printing: often effective for simple, recognisable bakery branding.
- Full-colour artwork: useful for illustrations, photographs, multi-colour identity systems and seasonal designs.
- Matte finishes: can create a restrained, contemporary presentation but may show marks differently from gloss finishes.
- Gloss finishes: can make colours appear more vivid and provide a polished look, depending on the material.
- Foil details: may suit gift boxes and premium confectionery ranges, but add production considerations.
- Embossing or debossing: can add tactile detail where board structure and artwork allow.
- Spot effects: can highlight selected design elements but need precise artwork setup and proofing.
Any finish used around a food-contact area should be assessed as part of the final packaging specification. The visual treatment must not override the pack’s functional requirements.
Approve artwork with production realities in mind
Packaging artwork should account for dielines, folds, glue areas, bleed, safe zones and panel orientation. A design that looks balanced on screen may not read correctly once folded into a box.
Before approval, check:
- logo direction on the front, sides and lid;
- readable text sizes;
- contrast between text and background;
- placement of legal or product information required for your sales channel;
- whether key messaging is hidden when the pack is stacked;
- colour expectations and proofing method;
- alignment around windows, cut-outs and folds;
- areas reserved for stickers, date codes or variable information.
For a broad range of carton styles and configuration options, explore custom printed packaging boxes alongside your product dimensions and packing process.
Branding
Custom packaging is a physical brand touchpoint: it can signal everyday convenience, artisan character, gifting value, family appeal or premium quality before the customer tastes the product. The strongest designs are clear enough to work at a glance and disciplined enough to remain consistent across multiple pack sizes.
For bakery and confectionery ranges, customers commonly need to identify the product, flavour, quantity and occasion quickly. Prioritise those elements before adding decorative detail.
Design around the customer’s purchase decision
Think about where the pack will be seen and opened:
- at a bakery counter;
- in a retail display;
- as part of a gift purchase;
- in an online order;
- at home after collection or delivery;
- at a workplace, event or celebration.
A counter pack may need bold product naming and quick variety recognition. A gift box may benefit from a more refined unboxing experience. An e-commerce pack may need a clear outer identity while retaining enough structure to arrive in good order.
A cohesive system can use the same logo, typography and colour palette across cartons, sleeves, labels and inserts, while differentiating flavours with one controlled visual cue. This can simplify range management and make repeat purchases easier.
Use labels strategically
Labels are useful where products rotate frequently, seasonal flavours change or batches require variable information. They can also make a standard box more flexible across several products.
However, labels have limitations. A label may wrinkle on textured surfaces, lift at corners, cover important artwork or slow packing if its application is not planned. Decide whether product information should be pre-printed, added by label or split between both methods.
A sensible approach is often:
- print stable brand and pack information on the carton;
- reserve a clean panel for variable labels or date coding;
- use labels for short-run flavours, limited editions or changing information;
- test label adhesion on the actual box finish and storage conditions.
Avoid common bakery packaging mistakes
Several problems recur in custom food packaging projects:
- Choosing a box before measuring the finished product. Decorations, liners and inserts are often overlooked.
- Using one carton for incompatible products. Dry biscuits, warm pastries and chilled cakes have different needs.
- Adding a large window without allowing for strength. Cut-outs can alter how the carton performs in handling.
- Ignoring packing workflow. A complex design may be impractical during peak production periods.
- Leaving no space for variable information. Date codes, labels and batch details need planned areas.
- Treating food-contact suitability as a general assumption. The complete material system must suit its intended use.
- Approving artwork without a folded sample. Folds, glue flaps and panel orientation can change the final result.
- Overdesigning small cartons. Too many messages, colours and finishes can make a compact pack hard to read.
A practical selection checklist
Before placing an order for custom packaging for bakery and confectionery products, confirm that you can answer these questions:
- What exactly is being packed, and in what condition: warm, cooled, chilled or frozen?
- Does the food touch the carton, or is there a separate food-contact layer?
- What internal dimensions and head clearance does the finished product need?
- Is the product likely to shift, grease, sweat, crumble or melt?
- Is a window genuinely useful for sales and product identification?
- Will the pack be filled manually, and how quickly must it be assembled?
- How will packed items be displayed, stacked, transported and opened?
- Which information needs to be printed, labelled or date coded?
- What proof, sample or pilot pack should be reviewed before full production?
- Have food-contact, labelling and other applicable Australian requirements been checked for the product and sales channel?
The best bakery and confectionery packaging is not necessarily the most elaborate option. It is the one that fits the product accurately, supports safe and efficient handling, communicates the brand clearly and gives customers a pleasing experience from shelf to serving. XGolden Print can support custom box and printing discussions where a defined specification, artwork and pack format are ready to be developed.
