
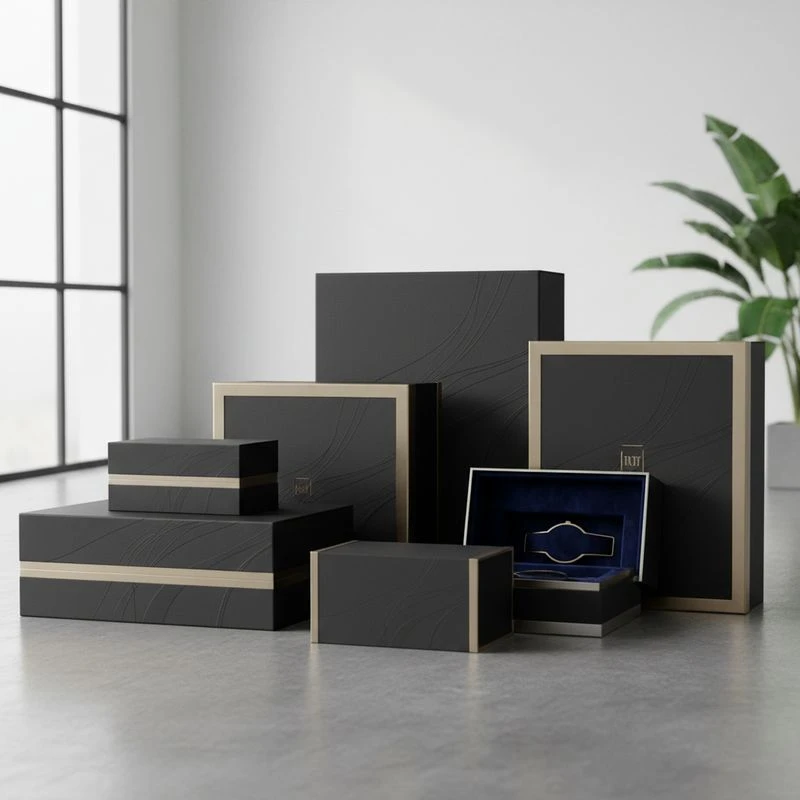
Custom rigid boxes for high end product lines are designed to make a product feel considered before it is even handled. Their value comes from a stable board structure, precise fit, refined presentation and the ability to build a branded unboxing experience around the product.
For Australian brands, the right rigid box is not simply the most decorative option. It should suit the product’s size, fragility, retail display needs, storage conditions and fulfilment process. Start with the product and customer experience, then choose the structure, insert and finish that support both.
Rigid Packaging
Rigid packaging uses thick, non-collapsible board to form a solid box base and lid. Unlike folding cartons, which are commonly supplied flat and assembled when packed, rigid boxes retain their shape throughout production, filling, display and gifting.
This construction makes rigid packaging a strong option for premium goods where presentation is central to perceived value. Common applications include:
- Premium cosmetics and skincare sets
- Jewellery, watches and accessories
- Fragrance and personal-care products
- Technology accessories and limited-edition products
- Gourmet gifting and specialty food presentation, where suitable materials are specified
- Corporate gifts, membership packs and launch kits
- Apparel accessories, footwear and premium stationery
- Homewares, candles and small lifestyle products
A rigid box can be wrapped in printed paper, coloured paper, textured paper or other suitable covering materials. The product may sit directly in the box or be held in place by an insert. This layered construction enables more visual and tactile choices than a basic carton, but it also means that material selection and artwork need careful coordination.
Common rigid box structures
The structure affects presentation, packing workflow and how well the box fits the product. The most suitable style depends on how customers are expected to open, retain or reuse the packaging.
| Box style | How it works | Best suited to | Points to confirm |
|---|---|---|---|
| Two-piece lid and base | A separate lid fits over a box base | Gift sets, apparel accessories, premium retail products | Lid depth, opening feel, stacking requirements |
| Shoulder and neck box | An inner neck creates a stepped reveal when the lid is removed | Fragrance, cosmetics, presentation-led gifting | Product clearance and alignment of lid, neck and base |
| Magnetic closure box | A hinged lid closes against concealed magnets | Launch kits, corporate gifting, premium sets | Closure alignment, mailer needs and recycling considerations |
| Drawer or sleeve box | An inner tray slides from an outer sleeve | Jewellery, technology accessories, compact gift packs | Pull mechanism, tray stop and ease of removal |
| Hinged lid box | Lid remains attached to the base | Keepsake packaging and curated product sets | Hinge durability in intended use and opening angle |
| Book-style box | A side-opening hinged format, often with a magnetic closure | Presentation kits, multi-item sets and premium media | Internal layout, closure position and product access |
A two-piece box is often a practical starting point because it is familiar, versatile and suitable for many product shapes. A magnetic or book-style construction can create a stronger reveal, although it may introduce more components and require closer attention to assembly and material separation at end of life.
Rigid boxes versus folding cartons
Neither format is automatically better. The choice depends on the role packaging plays in the product line.
| Consideration | Custom rigid box | Folding carton |
|---|---|---|
| Presentation | Structured, weighty and often gift-like | Can be polished and premium, but generally lighter |
| Storage before filling | Typically occupies more volume | Usually supplied flat for efficient storage |
| Product support | Can accommodate fitted inserts and layered reveals | Can use inserts, but with less inherent structural mass |
| Retail use | Suits elevated display and presentation | Suits a broad range of shelf and hanging formats |
| Reuse potential | Often retained by customers where design supports it | More commonly disposed of after opening |
| Budget planning | Usually involves more materials and construction steps | Often suited to cost-sensitive formats |
Rigid packaging is most effective when it adds a clear benefit: protecting a presentation-sensitive product, organising a multi-piece kit, supporting giftability or reinforcing a premium price position. Using a heavy box for a low-value or fast-moving product may add cost and handling complexity without creating a proportionate customer benefit.
Sturdy Design
A rigid box feels substantial because of its board construction, but a sturdy design is about more than choosing a thick material. The box, wrap, insert and product need to work as one system.
Begin by defining what the packaging must do:
- Hold the product securely during normal handling.
- Present it in the intended orientation when opened.
- Avoid unnecessary movement within the box.
- Work with the outer packaging used for storage or delivery.
- Allow staff or customers to remove the product without damaging it.
A rigid box should not be treated as a substitute for transport protection. If products will be posted or sent through a distribution network, assess the rigid box together with the external mailer, cushioning and packing method. A beautifully finished presentation box may still be vulnerable to scuffing, crushing or moisture if the outer packaging is not properly specified.
Size the box around the product, not the other way around
Measure the actual packed product, including caps, cords, protective sleeves, labels and any accessories. Then allow appropriate clearance for the insert and a practical removal experience.
Key dimensions to provide when requesting a quotation or prototype include:
- Product length, width and height
- Product weight
- Shape variations, such as curves, tapering or protruding parts
- Number of units or accessories in each box
- Desired product orientation
- Clearance required for easy lifting or removal
- Whether the product is already wrapped, bagged or labelled
- Any components that can scratch, leak or transfer colour
Avoid relying on a product drawing alone when the finished item is available. Physical samples often reveal small features that affect fit, including raised branding, uneven bases and closures.
Choose inserts for restraint and access
An insert makes the opening experience neater and helps stop products from shifting. Its purpose is not only visual; it must suit the item’s weight, shape and handling needs.
Common insert options include:
- Paperboard inserts: Suitable for lighter items and compartment layouts. They can be printed or wrapped to match the box.
- Moulded pulp inserts: A fibre-based option that may suit brands prioritising a more natural appearance. Confirm surface finish and product compatibility.
- Foam inserts: Often used where close cushioning or precise cut-outs are needed. Consider visual presentation and end-of-life expectations.
- EVA or similar dense foam: Can provide a clean, fitted appearance for certain products. Check material suitability and customer expectations.
- Fabric-covered pads or cushions: Often used for jewellery and small luxury items where a softer presentation is required.
- Paper wrap, tissue or dividers: Useful for separating components, but may not provide enough restraint for a heavy or fragile product on their own.
The best insert is one that holds the product reliably without making removal frustrating. Include finger notches, ribbon lifts, pull tabs or a sensible clearance gap where needed. A tightly fitted product may look impressive in a sample but create an awkward experience at scale.
Design for the full packaging journey
A premium box can pass through several hands: production staff, fulfilment teams, retail staff, gift recipients and customers returning or storing the item. Consider each stage before locking in the construction.
Questions worth asking include:
- Can the product be packed consistently without specialist handling?
- Will the lid or sleeve remain clean during fulfilment?
- Is there enough room for any mandatory label, barcode or batch information?
- Does the box stack safely in storage?
- Can retail staff open the box without damaging the wrap?
- Will customers understand how to access the product?
- Is an outer shipper required to protect the presentation box?
Where the packaging will hold cosmetics, food-adjacent goods, children’s products, electrical items or regulated goods, verify the applicable Australian requirements and material suitability with the relevant specialists. Decorative packaging choices should never override product safety, labelling or compliance needs.
Luxury Appeal
Luxury packaging is not defined by a single finish or a dark colour palette. It is created when material, structure, typography, colour and product fit feel intentional and consistent with the brand.
For high-end product lines, the box should communicate the right level of quality before a customer reads every detail. This may mean quiet restraint for a skincare range, bold colour blocking for a limited release, or a tactile paper wrap for a heritage-inspired product. The strongest designs usually prioritise a small number of well-executed elements rather than adding every available effect.
Build a clear hierarchy
A customer should be able to identify the brand, product and key variant without searching across the box. Establish a hierarchy before choosing embellishments:
- Brand identifier: Logo, wordmark or recognisable mark.
- Product name: The item or collection being purchased.
- Variant details: Shade, scent, flavour, size or edition, where relevant.
- Essential information: Directions, contents, warnings or other necessary details.
- Supporting story: A short statement, illustration or interior message if it adds value.
On a small box, too much copy can make an otherwise premium design feel crowded. Put essential information where it is readable and reserve internal panels or accompanying cards for longer brand storytelling.
Match the experience to the price position
A rigid box is especially useful when customers are buying an experience as well as a product. However, the format should still feel appropriate to the product’s price and use.
For example:
- A premium candle set may benefit from a rigid lid-and-base box with a simple protective insert.
- A jewellery item may need a compact hinged box, cushioned interior and discreet exterior branding.
- A product launch kit may use a book-style box with compartments for samples, printed material and accessories.
- A premium skincare collection may use a shoulder-and-neck box that reveals the products in stages.
The opening sequence should be purposeful, not overly complicated. Excessive layers, hard-to-remove trays or decorative elements that interfere with access can reduce the sense of quality.
Plan for consistency across a product range
If several products belong to the same high-end line, create a packaging system rather than treating each box as a separate design. Keep the brand architecture consistent while allowing products to remain distinguishable.
A practical system may define:
- Logo placement and minimum clear space
- Core colours and approved print variations
- Typefaces and information hierarchy
- Box proportions or structural families
- Locations for product variants and barcodes
- A consistent approach to internal printing and inserts
- Which finishes are reserved for special editions
This approach helps a range look cohesive across retail displays, online product photography and gifting occasions. It can also make future product launches easier to specify.
B2B Manufacturing
Ordering custom rigid boxes is a specification exercise, not just a design exercise. A successful brief gives a manufacturer enough detail to assess construction, materials, printing and assembly requirements before production.
For packaging buyers and product developers, clarity at the beginning reduces the chance of changes after artwork is finalised.
What to include in a manufacturing brief
Provide the following information where available:
- Box style and intended opening experience
- Finished internal and external dimensions
- Product samples or accurate product dimensions
- Expected quantity and whether repeat orders are planned
- Board, wrap and insert preferences
- Exterior and interior print requirements
- Required finishes, such as foil or embossing
- Artwork files and brand guidelines
- Product weight and any handling concerns
- Packing method for the finished boxes
- Desired delivery timing, allowing time for approvals and production
- Any labelling, traceability or market requirements that must be checked
If you are still deciding between formats, request guidance based on the product sample and intended use rather than selecting a structure solely from a photo. Images do not show opening resistance, product clearance or the practical space needed for inserts.
Businesses sourcing other formats alongside rigid packaging can also review custom printed box options to compare structural approaches for different products.
Artwork preparation and proofing
Artwork for a rigid box is applied across separate panels, folds and wrapped edges. This means a graphic that looks balanced on a flat layout may shift visually once assembled.
Before approving production, check:
- Logo placement across lids, bases and side panels
- Alignment of patterns and colour blocks around corners
- Readability of small text after finishing processes
- Colour expectations on the chosen wrap material
- Whether foil, embossing or debossing is positioned clear of folds and edges
- Barcode scan area and required quiet space, where applicable
- Interior artwork orientation when the box is opened
- Final product fit with the selected insert
A prototype or pre-production sample can be valuable when the structure, product fit or finishing is complex. It provides an opportunity to assess the full physical experience, rather than approving only a digital visual.
Commercial details to confirm
Custom rigid box projects vary significantly. Confirm commercial terms directly with the supplier rather than assuming that one project will match another.
Important points include:
- Minimum order quantity
- Whether tooling, sampling or setup charges apply
- Included and excluded components, such as inserts or ribbons
- Artwork amendment process
- Product packing requirements
- Tolerances relevant to product fit
- Storage and delivery arrangements
- How reorders are managed
- Responsibility for supplying approved artwork and product samples
XGolden Print has 27 years of experience in custom packaging and printing, with a 15,000 square metre factory, more than 500 employees and production capacity exceeding 10 million units. These broad capabilities can be relevant when assessing a packaging partner, but the specific box structure, materials, minimums and production terms should always be confirmed for the individual project.
Finishing
Finishing is where a rigid box can move from polished to distinctive, but it should support the design rather than compete with it. The most suitable finish depends on the brand’s visual language, the paper wrap, the artwork and how the box will be handled.
Popular finishing choices
- Matte lamination: Creates a low-sheen surface that can suit understated branding. Check its appearance with dark colours and frequent handling.
- Gloss lamination: Adds shine and can make colours appear more vivid. It may be suitable where a bright, polished look is wanted.
- Soft-touch lamination: Produces a velvety tactile effect. Review its mark resistance and suitability for the intended handling environment.
- Hot foil stamping: Applies metallic or coloured foil for logos, borders or small decorative details. Fine type and intricate artwork require careful review.
- Embossing: Raises selected areas to add dimension and tactile interest.
- Debossing: Presses an image or mark into the surface for a subtle, restrained effect.
- Spot UV: Adds a gloss contrast to chosen graphic elements, often over a matte background.
- Textured or uncoated paper wraps: Bring natural tactility and character, though they may behave differently from coated papers during printing and handling.
- Ribbons, pull tabs and closures: Improve access or add a gift-like quality, but should be assessed for assembly requirements and end-of-life considerations.
Combining two or three finishes can work well when each has a clear role. For example, a matte wrap, restrained foil logo and embossed mark can create depth without overwhelming the design. Adding foil, spot UV, embossing, metallic inks and multiple textures to one small surface can make branding harder to read.
Consider finish limitations early
Finishes are not interchangeable. A technique that works beautifully on one artwork may not suit another because of line thickness, coverage area, paper texture or location near a fold.
Common issues to avoid include:
- Very fine foil details that may not reproduce clearly
- Large solid dark areas that show handling marks more readily
- Embossing too close to a box edge or fold
- Gloss effects used over text that needs easy readability
- Contrasting elements that become misaligned across wrapped corners
- Textured wraps chosen without considering small type and fine artwork
- Decorative materials that complicate the intended recycling pathway
Ask to review relevant material swatches, print samples or prototypes before approving a finish. Screen colours and digital mock-ups are useful design tools, but they cannot fully represent texture, metallic effects or the way light moves across a finished box.
Common mistakes when specifying premium rigid boxes
Several avoidable issues can undermine an otherwise strong packaging concept:
- Choosing dimensions before testing product fit: Always account for inserts, accessories and removal space.
- Treating the rigid box as a shipping carton: Use appropriate external protection for transport and fulfilment.
- Overdesigning the exterior: Premium presentation often relies on restraint and clear hierarchy.
- Forgetting operational needs: Consider how staff pack, label, store and open the box.
- Selecting finishes late: Structural folds and wrap edges can affect where finishes can be used.
- Ignoring the inside of the box: The interior is a major part of the unboxing experience.
- Assuming all materials have the same disposal pathway: Check the specific materials, adhesives, closures and local collection guidance.
- Approving only digital artwork: A physical sample can reveal fit, colour and handling issues that are not obvious on screen.
FAQ
Are rigid boxes suitable for e-commerce orders?
They can be, particularly where presentation is important, but they usually need an external protective mailer or shipper. Assess the full packaging system rather than expecting the presentation box to manage all transport risks.
Can a rigid box include several products?
Yes. Multi-item sets can use dividers, cavities, trays or layered inserts to organise products. The internal layout should keep items separated, accessible and visually balanced.
Are custom rigid boxes recyclable?
Recyclability depends on the complete construction, including board, paper wrap, lamination, magnets, ribbons, foam, adhesives and inserts. Ask for material details and check how the finished components can be separated and handled in the intended market.
What is the best rigid box style for a gift set?
A two-piece lid-and-base box is versatile and familiar. A shoulder-and-neck, drawer or magnetic closure box may create a more theatrical reveal. The best choice depends on the number of items, product weight, presentation goals and packing process.
How should I compare packaging suppliers?
Compare like-for-like specifications: structure, dimensions, board, wrap, insert, print, finishes, sampling, packing method and commercial terms. A lower figure is not directly comparable if it excludes a fitted insert, a finishing process or another required component.
The best custom rigid box is one that protects the product presentation, fits naturally within your fulfilment process and expresses the value of the line without unnecessary complexity. Prepare a clear product sample, dimensional brief and artwork hierarchy first, then assess structural samples and finishes against the real customer experience.
