
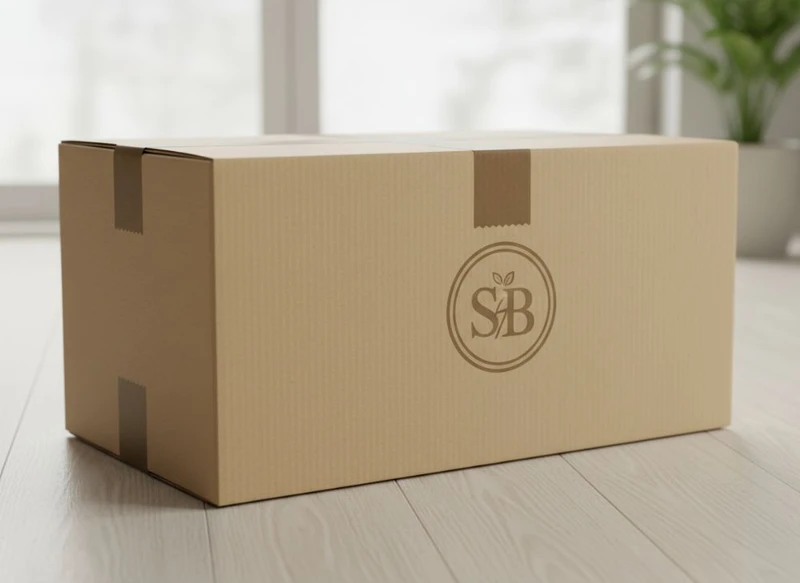
Subscription box success depends on packaging that protects the order, communicates the brand quickly and gives customers a reason to look forward to the next delivery. The essential custom packaging formula is not a single premium box: it is a coordinated system of an outer shipper, an appealing inner box, secure seals, useful printed materials and carefully managed weight.
For Australian subscription brands, start by defining the product’s physical needs and the unboxing sequence before choosing finishes or artwork. This avoids a common problem: a beautiful presentation box that is oversized, difficult to pack or poorly protected in transit. The most effective format balances durability, presentation, repeatability and a realistic landed cost per shipment.
The Role of the Outer Shipping Box
The outer shipping box is the protective layer. Its primary job is to arrive in good condition while fitting the inner contents with as little empty space as practical. It also sets the first impression, especially for customers who notice the parcel before opening it.
A plain corrugated outer box can be the right choice where the branded experience happens inside. A printed outer box may suit products where brand recognition at the doorstep is important, but exterior printing should be chosen with care: parcels can be scuffed, stacked and exposed to varied handling conditions.
Specify the outer box around the packed product
Measure the complete packed unit, not just the product. Include the inner box, tissue, void fill, inserts, samples and any items likely to move during delivery. Then allow enough clearance for the chosen protective material without creating an unnecessarily large parcel.
Key points to confirm with a packaging supplier include:
- Internal dimensions: These determine how the packed contents fit.
- Board construction: The appropriate grade depends on the product weight, fragility, stacking requirements and handling environment.
- Closure method: Self-locking mailers, tuck closures and tape-sealed cartons each create different packing workflows.
- Print coverage: A small logo or instruction panel can be more practical than full exterior coverage.
- Storage format: Flat-packed cartons typically reduce storage space before assembly.
- Recyclability information: Only use disposal claims or symbols after confirming that the box materials, inks, adhesives and local collection conditions support them.
Avoid using a mailer as the only protective layer for products that can crack, leak, dent or be crushed. Those products may need dividers, cushioning, a snug internal fit or a more robust outer carton. Conduct a practical packed-product review that reflects the way your own orders will be assembled and sent, rather than assuming a box style suits every item.
For brands comparing formats, custom packaging boxes can provide a useful starting point for assessing mailers, cartons and product boxes as separate parts of one packaging system.
Designing the Inner Paper Box for Visuals
The inner paper box is where a subscription becomes an experience. Once the protective shipper is opened, this box should make the contents feel ordered, intentional and recognisably yours.
For many monthly programmes, a folding carton or rigid-style presentation box creates a clearer visual hierarchy than placing individual products directly into the shipping carton. The best choice depends on product weight, the expected reuse of the box, assembly time and the level of presentation needed.
Build a clear visual hierarchy
Customers should be able to understand the box at a glance. Limit the main visual elements to a logo or wordmark, a restrained colour palette, one supporting graphic device and a simple interior message if relevant. Too many competing patterns, slogans and promotional messages can make a compact box feel crowded.
Consider how the design works across these touchpoints:
| Packaging area | Main purpose | Useful design approach |
|---|---|---|
| Lid or front panel | Immediate recognition | Brand name, seasonal theme or a distinctive graphic |
| Side panels | Detail without clutter | Short web address, product category or understated pattern |
| Interior lid | Welcome and orientation | A short message or opening instruction |
| Base or internal panel | Supporting information | Batch-specific note, care direction or a subtle repeat pattern |
| Product compartments | Organisation and protection | Simple labels, colour coding or shaped inserts where needed |
Choose a print finish for its function, not simply for impact. Matte finishes can support a calm, tactile appearance. Gloss elements can draw attention to selected areas. Foil, embossing and special coatings may be appropriate for premium gifting, but they add decisions around budget, production complexity and how the design will look after handling.
Before approving artwork, review the supplied dieline and keep important text away from folds, cut lines and glue areas. Check that barcodes, small type and fine reversed-out details remain legible at the final box size. If your range contains multiple product variants, establish a consistent area for variant names or colours so customers and fulfilment teams can identify the correct edition quickly.
Custom Stickers for Sealing and Branding
Custom stickers are one of the most flexible ways to add branding without redesigning an entire box. They can secure tissue, close a box flap, identify a limited edition or carry a small practical message.
A sticker works best when it has one clear purpose. A large decorative seal may be ideal for tissue, while a smaller label may be more suitable for product identification. Trying to place a logo, long instructions, an offer, a QR code and a detailed ingredient or material list on one small sticker usually compromises readability.
Choose labels according to the surface and task
Confirm the sticker material and adhesive against the actual packaging surface. Textured paper, coated board, uncoated kraft, tissue and plastic wraps can all behave differently. Temperature, moisture and friction during packing or shipping can also affect adhesion.
Use this checklist before specifying labels:
- Match the adhesive to the surface it will contact.
- Allow enough overlap if the sticker is intended to hold a closure shut.
- Keep critical text large enough to read comfortably.
- Ensure any QR code has sufficient quiet space and can be scanned after printing.
- Decide whether labels will be applied by hand or through a packing process.
- Check that the label position does not obstruct mandatory product information where relevant.
- Verify any material, recyclability or compostability statement before printing it.
A branded seal can make a standard inner wrap look purposeful at comparatively low complexity. Explore custom printed stickers when you need a flexible element for seasonal editions, limited runs or changing offers.
Incorporating Vouchers and Info Cards
Cards give a subscription box a voice without forcing every message onto the packaging itself. They can welcome new subscribers, explain the month’s theme, provide product guidance, invite feedback or offer a future purchase incentive.
The most useful card answers a question the customer is likely to have at that moment. For example, a discovery box may need a concise “what’s inside” guide, while a food, beauty or craft-oriented box may need directions for use, care or storage. Make sure product-specific claims, instructions and any required information are reviewed for your category and intended market before production.
Keep the message useful and measurable
A voucher should offer a clear next action, such as sharing the box, purchasing a featured item or returning for a related product. Avoid vague wording that leaves customers unsure how, when or where they can use it.
Useful content options include:
- A monthly editor’s note or theme introduction
- Product names and concise explanations
- Usage, care or storage guidance
- A referral code or a future-order offer with clearly stated conditions
- A QR code linking to supplementary content
- A feedback prompt or social sharing invitation
- A packing or return instruction where relevant
Make card dimensions work with the box rather than treating them as an afterthought. A card that curls at the edges, covers the products or sits awkwardly above the box rim can detract from the presentation. If the box changes size between plans, use a card format that can be safely accommodated across all variants.
Test digital destinations before every print run. A QR code is only helpful if it opens a current, mobile-friendly page and the offer or information remains valid for the life of the cards.
Weight and Shipping Cost Optimisation
Weight and volume affect the ongoing viability of a subscription model. Packaging that looks premium but adds excess board, layers or empty volume can increase shipping costs and complicate storage. Conversely, cutting material too far can raise the likelihood of damage and undermine the customer experience.
The goal is fit-for-purpose packaging: enough protection for the product and delivery journey, with no unnecessary bulk.
Where to reduce weight without reducing usefulness
Begin with a product-by-product packing layout. Arrange every component in the proposed box, identify what prevents movement and then remove materials that do not protect, organise or communicate something important.
Potential improvements include:
- Using a smaller footprint where the contents permit it
- Replacing excess loose fill with a correctly sized insert or divider
- Combining a welcome card and product guide when the information is compatible
- Designing one versatile box format for closely related subscription plans
- Using a lighter paper-based insert for low-risk, lightweight products
- Keeping decorative layers purposeful rather than automatic
Do not assume that a lighter solution is always less expensive overall. A thinner board may be unsuitable for a heavy pack. A smaller box may require more labour to assemble. An insert can reduce movement but add material and assembly steps. Compare total cost across packaging components, packing time, storage space and the potential consequences of product damage.
It is also important to confirm the dimensional and weight rules that apply to your selected delivery service and the destinations you serve. These commercial terms vary, so build your packaging specification around current provider requirements rather than relying on historic estimates.
Enhancing Value with Branded Inserts
A branded insert does more than fill space. When designed well, it protects the contents, guides the opening experience and makes the subscription feel specifically made for the products inside.
Common insert options include folded board dividers, die-cut trays, sleeves, pads and paper wraps. The right format depends on product shape, number of items, fragility and the degree of separation needed.
Match the insert to the product risk
Use compartments where products may knock together, leak onto one another or become difficult to identify. For softer, low-risk goods, tissue or a paper wrap may be enough to create order and add an opening moment. For heavier products, ensure the insert does not collapse or shift when the box is lifted.
Ask these practical questions:
- Does the insert prevent movement in all directions?
- Can the customer remove the product without tearing the pack?
- Is the box still easy for your team to assemble?
- Does the insert cover essential information or create excessive layers?
- Can it be used across multiple editions, or will it become obsolete when the assortment changes?
- Are the selected materials compatible with your desired disposal guidance?
Keep branding on inserts subtle where they are likely to be covered by products. A pattern, short message or colour block can be enough. Save detailed copy for cards and visible box panels.
Keeping the Design Fresh for Repeat Customers
Repeat customers want recognition and novelty in equal measure. The core packaging should remain familiar enough to reinforce brand identity, while selected changeable elements can signal that each delivery is new.
Rather than redesigning the entire box every month, create a stable packaging architecture and rotate lower-risk components. This approach can make planning easier while allowing seasonal relevance and product storytelling.
Use a fixed-and-flexible design system
Keep these elements consistent:
- Primary logo placement
- Core typefaces and colour relationships
- Box structure and opening sequence
- Key information locations
- Packaging sizes used by each subscription tier
Refresh these elements as needed:
- Interior print or lid message
- Tissue colour or seal sticker
- Information card artwork
- Product labels and variant panels
- A collectible illustration or theme detail
- A voucher or digital content invitation
This system avoids the inconsistency that can occur when every edition starts from a blank page. It also helps procurement teams compare like-for-like specifications and reduces the risk of ordering incompatible materials.
Be cautious with highly seasonal artwork if boxes or printed materials may remain in storage after the campaign. Date-specific designs, expiry-sensitive vouchers and narrow product references can create waste if demand changes. Where possible, place time-sensitive messages on stickers or inserts that can be updated independently.
Gift Packaging Aesthetics for Monthly Delivery
Subscription boxes are often bought as gifts, whether for a one-off occasion or an ongoing delivery. Gift-ready packaging should feel thoughtful without making the recipient work through excessive layers or leaving the purchaser unsure what has been sent.
The strongest gift packaging aesthetics come from considered proportion, material feel, colour control and a clean reveal. They do not require every surface to be heavily printed or embellished.
Design for the sender and recipient
The sender may want confidence that the order looks presentable on arrival. The recipient wants an easy, enjoyable opening process and products that feel protected rather than overwrapped.
To create a gift-appropriate monthly format:
- Use an outer shipper that protects the presentation box.
- Ensure the inner box opens intuitively without tools or excessive force.
- Reserve premium finishes for focal areas, such as a logo or short greeting.
- Include a gift message option only if the process supports it reliably.
- Keep invoices and transactional documents separate from the gift presentation where your order process allows.
- Use a tidy product layout so the box still looks considered after the lid is opened.
- Make any gift message, voucher conditions and product instructions easy to find.
A presentation box should also suit the contents. A delicate, high-finish box may be appropriate for lightweight gift products, while a more robust printed mailer may better suit a practical monthly kit. Review your intended product range before committing to a structure, particularly if future editions will vary in weight or dimensions.
For formats where the box itself is a central part of the gifting experience, consider gift packaging options alongside the protective shipping layer.
A practical specification checklist
Before requesting quotes or approving production, document the following:
- Product dimensions, weights and fragility
- Number of items and packing order
- Inner and outer box dimensions
- Board, paper, label and insert materials
- Closure and sealing method
- Print areas, colours, finishes and artwork versions
- Variable components for seasonal or subscriber-tier changes
- Assembly steps and storage requirements
- Required product information and internal approval process
- Disposal messaging that has been verified for the materials and market
- A packed sample review plan for your actual product combination
The formula for subscription box success is consistent rather than extravagant: protect the product, make the brand recognisable, explain what matters, manage size and weight, and leave room for each month to feel new. If you are refining a specification, XGolden Print’s packaging background may help provide context on its custom packaging and printing focus; compare any proposed format against your own products, packing workflow and commercial requirements before proceeding.
