
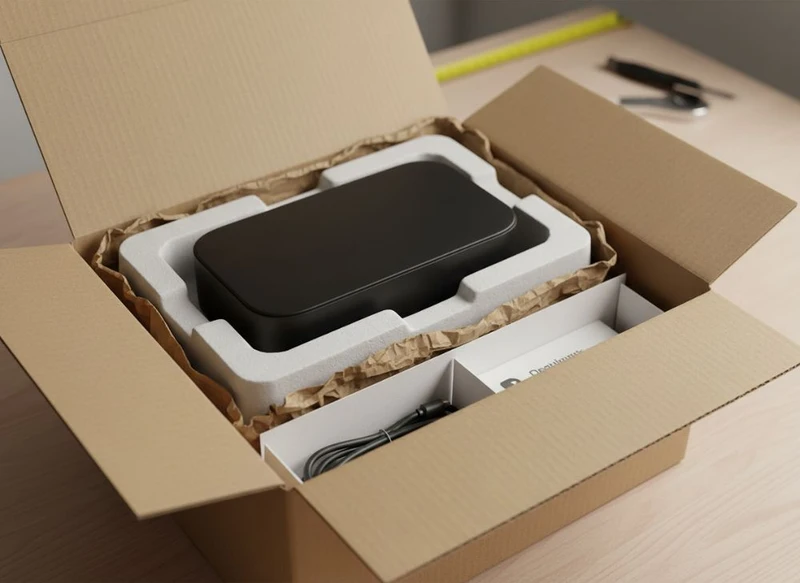
Custom paper box inserts and fillers do more than make a parcel or gift box look finished. Their essential role is to control product movement, cushion vulnerable points, separate components and create an organised unboxing experience. The right choice depends on the product’s weight, shape, fragility, presentation goals and packing method.
For Australian brands and packaging buyers, the most effective solution is usually one that uses an insert to hold the product in position and a filler only where it is needed to close small gaps or add visual texture. Avoid treating filler as a substitute for a properly designed fitment when the item is heavy, delicate or made up of multiple parts.
Protecting Your Product: Function Over Form
Protection should be the first design criterion for any custom insert or filler. A visually striking box will not deliver a good customer experience if the product shifts, rubs against another component or reaches its destination with damaged edges.
A paper box insert can protect products by:
- Holding an item in a fixed orientation
- Separating products, accessories and instructions
- Supporting weak areas such as glass corners, lids or protruding parts
- Reducing empty space within the outer box
- Preventing products from colliding during handling
- Making removal easier without pulling or tipping the product out
Start by identifying the product’s risks. For example, a small bottle may need a neck support and a snug cavity around its body. A boxed electronics accessory may need compartments for cords and adapters. A delicate gift set may require dividers that prevent individual items from touching.
The outer box and the insert must work together. An insert cannot compensate for an oversized box with substantial unfilled voids, while a tight outer box can crush a product if the insert has not allowed appropriate clearance. Review the full packed arrangement, including the product, its primary wrapping, instructions, labels and any promotional material.
For products sold or distributed in Australia, confirm any applicable packaging, material, labelling and product-safety requirements with the appropriate specialists. Requirements vary according to the product category and intended use of the packaging.
Questions to answer before choosing an insert
Before requesting a packaging quote or creating a prototype, document:
- Product dimensions: Measure the longest, widest and tallest points, including caps, handles, cords and protective wrapping.
- Product weight: Heavier items need more structural support than lightweight goods.
- Fragile points: Identify surfaces likely to crack, dent, scratch or bend.
- Number of components: List every item that must fit inside the box.
- Box orientation: Decide how the recipient should open and view the product.
- Packing process: Consider whether products will be packed by hand, semi-automatically or through an automated line.
- Unboxing needs: Determine whether the insert should lift the product, frame it or conceal a surprise element.
Materials for Inserts: Foam, Cardboard, Moulded Pulp
Foam, cardboard and moulded pulp can all be appropriate insert materials, but they solve different packaging problems. Material selection should balance protection, appearance, material preferences, production method and the space available inside the box.
| Material | Best suited to | Key strengths | Considerations |
|---|---|---|---|
| Foam | Fragile, heavy or irregularly shaped products | Can provide close cushioning and shaped support | Confirm material suitability, finish and disposal expectations for the product and market |
| Die-cut cardboard | Retail products, kits, gift sets and lighter goods | Printable, adaptable and can create compartments or product platforms | May need reinforcement for heavy items or repeated handling |
| Moulded pulp | Products requiring shaped paper-based support | Can cradle certain forms and offers a tactile, natural appearance | Tooling, surface texture and dimensional tolerances should be reviewed early |
Foam inserts
Foam is often considered where the product needs close support around an unusual shape or has delicate surfaces. It can be supplied with cut-outs, layers and apertures that hold products in a particular position.
However, foam is not automatically the best answer for every fragile product. It can add material complexity, may not align with every brand’s packaging preference and can be unnecessary for a small, light item that fits securely within a paperboard insert. If foam is used, check the density, thickness, colour, product-contact suitability and cut-out tolerances before finalising production.
Cardboard inserts
Cardboard inserts are versatile because they can be die-cut, folded, printed and integrated into the visual design of the box. They are commonly used for cosmetics, apparel accessories, food-adjacent gift packaging, stationery, subscription boxes and multi-item sets.
Options include:
- Folded platforms that raise a product into view
- Divider grids for multiple units
- Sleeve-style retainers around a product
- Layered inserts for two-tier presentations
- Tabs and locks that hold products without adhesive
- Flat cards with cut-outs for slim products or accessories
For brands considering custom packaging boxes, a cardboard insert can often be planned alongside the outer carton so that board thickness, opening style and internal clearances are considered as one system.
Moulded pulp inserts
Moulded pulp is a shaped fibre-based material used to cradle products. Its textured surface can suit brands seeking a subdued, natural or practical presentation. It can be useful for products with rounded forms, particularly where a shaped tray provides a more stable fit than a flat divider.
The main limitation is that moulded pulp is not as visually precise as a finely printed paperboard insert. It may also require early design decisions because the shape and tooling approach influence feasibility. Review the fit with physical samples, particularly if the product has narrow tolerances, glossy finishes or components that could catch on the surface.
Designing Die-Cut Cardboard Inserts for Fit
A die-cut cardboard insert should secure the product without making it difficult to pack or remove. The design process is about controlled clearance: enough room to avoid pressure damage, but not so much room that the product rattles inside the box.
Begin with an accurate product sample rather than relying only on nominal dimensions. Small variations in a bottle, jar, folded textile item or assembled product can affect the fit of a die-cut cavity.
Practical design principles
Allow for the full product, not just the main body. A product’s cap, handle, label seam, protective sleeve or cable can be the widest point. Missing it can result in an insert that buckles or creates pressure where it should not.
Account for board thickness and folds. Dimensions on a flat dieline do not translate directly to the usable internal space once the insert is folded. Fold lines, locking tabs and double layers all take up room.
Use retention features selectively. Thumb notches, finger holes, lift ribbons and pull tabs can make a product easier to remove. They should not weaken the surrounding structure or expose the product unintentionally.
Support the base as well as the sides. A tightly cut side cavity may stop lateral movement, but a product can still shift vertically if there is unfilled space above or below it.
Design for the packing sequence. Consider the order in which a packer places the insert, product, accessory card and lid. An insert that looks elegant but requires multiple difficult folds may slow hand-packing and create inconsistent results.
Prototype before committing. A flat sample or basic mock-up can reveal problems with clearance, orientation, product removal and lid closure. Test the complete pack, not just the insert in isolation.
A common mistake is specifying a very tight cavity to create a premium appearance. Products need practical tolerances, especially where materials change slightly in thickness or where the product itself has natural variation. The best fit is secure and repeatable, rather than simply as tight as possible.
Visual Appeal: Colour and Print on Inserts
An insert is a useful branding surface, especially when the customer sees it immediately after opening the box. Printing can turn a functional component into part of the product presentation without adding a separate card.
Colour and print may be used to:
- Continue the colours or pattern from the outer box
- Frame the product against a contrasting background
- Show simple product placement instructions
- Include care notes, a short brand message or a QR code
- Differentiate variants within a product range
- Make accessories easier to identify
Consider how the insert will look after packing. A large printed panel may be mostly hidden by the product, while a message under a lift-out tray may be revealed at the right moment. Place important instructions where they remain visible and do not rely on a dark print colour if it will be obscured by a similarly coloured product.
Printed inserts also need to suit the material and the intended finish. Some concepts are better expressed with an uncoated board and restrained ink coverage, while others suit a smoother printed surface. Confirm artwork specifications, colour expectations, coating choices and any requirements for marks or information before production.
If the pack includes product identification or promotional seals, custom printed stickers may be more practical than changing the insert artwork for every short-run variation. Keep labels clear of locking tabs, folds and product-contact areas where they may lift or affect assembly.
Gift Packaging Inserts: Adding a Surprise Element
Gift packaging inserts can make the opening sequence feel intentional. Their value is not only decorative: they can guide the recipient’s attention, reveal products in stages and prevent multiple items from appearing cluttered.
For custom gift packaging, consider one of these arrangements:
- Top presentation card: A printed card sits above the product, introducing the set before the contents are revealed.
- Lift-out tray: The first layer contains a smaller item, message card or accessory; the main product sits below.
- Framed cavity: A die-cut opening surrounds the product and creates a display-like effect.
- Compartmented set: Individual cavities give each item a defined place and reduce contact between products.
- Concealed message: A short message printed beneath the product adds a discovery moment without adding another component.
The surprise element should not make the package frustrating to open. Avoid inserts that require excessive pulling, tear easily when lifted or make the product hard to grasp. For gift sets, consider whether a recipient unfamiliar with the product will understand how to remove each component.
Also consider the point of sale. Retail staff and customers may open display packaging more than once, so the insert should remain presentable after reasonable handling. A delicate paper hinge or loosely fitted tray may be unsuitable for a box that will be repeatedly opened before purchase.
Cost Analysis of Different Insert Types
The lowest-cost insert is not always the lowest-cost packaging solution. A simple filler may cost less initially than a fitted insert, but it can require more packing time, more material volume and less consistent presentation. Conversely, a complex insert can add setup and assembly cost that is unnecessary for a robust product.
Evaluate the total packaging system rather than one line item.
| Insert or filler type | Typical cost drivers | Suitable when | Potential trade-off |
|---|---|---|---|
| Flat cardboard pad | Board size, print and cutting | A product needs separation or a clean base | Limited control over movement |
| Folded cardboard insert | Dieline complexity, board grade, print and assembly | Products need compartments or structured support | More complex folds can increase packing effort |
| Layered die-cut insert | Number of layers, cut-outs and assembly | Presentation and positioning both matter | Uses more material and requires accurate alignment |
| Foam fitment | Material type, thickness, cut-out complexity | Products need close cushioning or irregular-shaped support | May not suit all material preferences or brand aesthetics |
| Moulded pulp tray | Shape, tooling approach and order requirements | A shaped fibre tray is appropriate | Less flexible for frequent shape changes |
| Loose paper filler | Material volume, colour and packing time | Lightweight products need void fill or a gift-like appearance | Does not reliably restrain heavy or fragile products |
When comparing options, request clarity on what is included: insert material, print, finishing, die-cutting, folding, assembly state and outer box compatibility. If the insert arrives flat, factor in the time and space required to erect it. If it arrives pre-assembled, confirm how it will be stored and packed.
Do not assess cost without considering damage risk, presentation consistency and packer time. A well-designed paperboard insert may reduce the need for additional filler, tissue or separate product cards.
Automated Assembly vs. Hand-Packing
The intended packing method strongly affects insert design. A hand-packed gift set can accommodate more intricate folds and layered details than a high-volume operation that needs a simple, repeatable sequence.
Hand-packing considerations
Hand-packing is often appropriate for premium gifts, variable product combinations, lower-volume ranges and products that need visual adjustment before the lid is closed. It allows a packer to arrange tissue, crinkle paper, ribbons and components with care.
However, the design should still be practical. Look for inserts that:
- Fold in an intuitive order
- Use clear tabs and locking points
- Do not require excessive force to assemble
- Give the packer sufficient room to place the product
- Make it obvious when an item is incorrectly positioned
Create a straightforward packing guide with images or numbered steps if the kit contains several components. This can reduce variation between packers and help maintain a consistent finished presentation.
Automated or semi-automated assembly considerations
Automated assembly generally favours inserts with consistent geometry and fewer complex manual steps. Flat blanks, simple folded trays and repeatable lock designs can be easier to integrate into a structured packing process than irregular hand-shaped fillers.
Before specifying an insert for automated assembly, confirm:
- Whether the design can be supplied flat or erected as required
- The direction of folds and locking tabs
- Product placement orientation
- Tolerance sensitivity at key cut-outs
- Whether adhesive, tape or additional components are needed
- How the insert behaves when stacked and separated
Even where full automation is not planned, designing for simple assembly can improve efficiency and reduce packing errors. Avoid unnecessary design flourishes that increase handling without improving protection or customer perception.
The Best Fillers: Shred, Crinkle Paper and Their Purpose
Shredded paper and crinkle paper are useful fillers, but they have a specific role: filling voids, adding light cushioning and enhancing presentation. They are not a replacement for a fitted insert where a product needs reliable restraint.
Shredded paper
Shredded paper can create a soft, layered bed for lightweight items. It works well in gift boxes containing products that are already protected by their own cartons, jars or wrappers. It can also reduce the appearance of empty space around a product.
Use an appropriate quantity. Too little shred allows movement; too much can bury small products, make packing inconsistent and create an untidy opening experience.
Crinkle paper
Crinkle paper adds volume and visual texture. It is commonly used for gift sets, seasonal presentations and subscription-style packaging because it can frame products while keeping the arrangement from looking sparse.
It is best suited to products that are relatively stable on their own. For example, crinkle paper can surround a small carton or wrapped item, but a heavy glass product should generally have a stabilising insert or divider as well.
Tissue and paper wraps
Tissue paper can protect surfaces from light scuffing, separate items and create a layered reveal. It offers very little structural protection by itself, so pair it with an insert, divider or suitably sized outer box where movement is a concern.
Choosing filler colour and volume
Choose filler colour in relation to the product and the box interior. A strong contrast can make the product stand out, while a tonal colour can create a calmer premium effect. Test the packed box under normal lighting, as filler can change the perceived colour of a product or make small details harder to see.
Common filler mistakes include:
- Using loose filler with a product that needs a fixed position
- Overfilling the box so the lid bulges or the product is hard to find
- Selecting a filler that sheds or catches on delicate product finishes
- Forgetting that fillers add packing time and storage volume
- Using filler to conceal an outer box that is too large for the product
A practical selection checklist
Use this checklist when choosing custom paper box inserts and fillers:
- Does the insert prevent the product from moving in all likely directions?
- Is the product easy to remove without damage or frustration?
- Does the outer box close cleanly with all components inside?
- Are fragile surfaces, corners and accessories separated?
- Does the material suit the product weight and shape?
- Can the insert be packed consistently using the intended process?
- Is loose filler used only for void filling, surface protection or presentation?
- Does the design support the intended retail, e-commerce or gift experience?
- Have physical samples been checked with the final product and packaging components?
- Have relevant market and product-category requirements been verified?
The essential role of custom paper box inserts and fillers is to make packaging more secure, organised and purposeful. Start with product protection, then refine the design through material choice, print, filler and assembly method. XGolden Print develops custom packaging and printing solutions; its company background may be useful when assessing a packaging partner. A detailed product sample, component list and preferred unpacking sequence are the best starting materials for a practical insert brief.
