
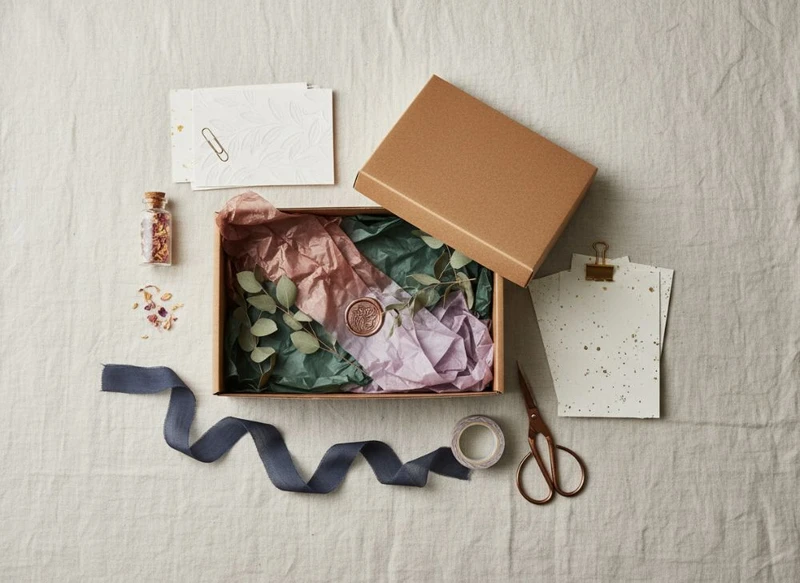
Perfect gift packaging balances presentation, protection, cost and practical assembly. The best result is not simply the most decorative box: it is a packaging system that suits the product, arrives in good condition, feels considered when opened and can be produced consistently.
Use the ultimate checklist for perfect gift packaging design & production as a sequence. Lock in the brand mood first, then confirm the box structure and materials, test a sample, calculate the full packaging cost and plan how each component will be packed.
Defining Your Gift Box Aesthetic and Mood
Start with a clear creative direction before choosing a box style or print finish. A moodboard can be useful, but it needs to translate into specific production decisions such as colour, paper texture, closure method and decorative elements.
Define the intended unboxing experience in a short brief:
- Audience and occasion: Is the pack for corporate gifting, retail purchase, a seasonal release, a subscription, or a direct-to-customer order?
- Brand character: Choose a few precise traits, such as refined, playful, natural, modern, premium or understated.
- Product role: Decide whether the box should make the item feel like a gift immediately or simply protect it before it is gift-wrapped.
- Visual hierarchy: Identify what should be noticed first: a logo, product name, illustration, message or a limited-edition detail.
- Colour system: Specify brand colours, supporting colours and any colour-matching requirements. Check print proofs rather than relying on a screen.
- Tactile details: Consider whether a smooth, uncoated, textured, soft-touch or metallic surface supports the intended mood.
- Opening moment: Plan what the customer sees when the lid lifts or the mailer opens. An inner message, tissue layer or branded seal can add impact without overcomplicating the exterior.
Keep the design legible. Small type, low-contrast colours and crowded artwork can make an otherwise premium pack difficult to use. Important product information, handling instructions and any required labelling should remain easy to find and read.
A common mistake is treating every surface as advertising space. Gift packaging often feels more premium when the exterior is restrained and the detail is reserved for the inside, a tag or a carefully placed sticker.
Finalising Structural Design (Size, Style)
The box structure must fit the product and the way it will be packed, stored, displayed and transported. A beautiful design will fail if the item moves around, the closure is awkward, or the assembled box takes too long to prepare.
Measure the complete packed product
Measure the product in its final condition, including any cap, cable, protective wrap, accessory, instruction card or insert. Record length, width, height and weight, then allow sensible clearance for internal protection and easy placement.
Too little clearance can cause scuffing, crushed corners or difficult packing. Too much empty volume can make a gift feel underfilled and may require unnecessary filler. The goal is a stable fit with an intentional reveal.
Select a box style for the job
Common gift box formats have different strengths:
| Box style | Best suited to | Key consideration |
|---|---|---|
| Two-piece lid and base | Premium gifts, sets and retail presentation | Requires a well-controlled fit between lid and base |
| Magnetic closure box | Higher-value gifting and reusable presentation | Confirm closure strength, board thickness and storage requirements |
| Drawer or slide box | Products that benefit from a reveal | Needs a pull feature and careful inner tray sizing |
| Folding carton | Lightweight products and efficient flat storage | May need inserts or reinforcement for fragile items |
| Rigid set-up box | Premium products, hampers and curated sets | Usually takes more storage space before use unless supplied in a collapsible format |
| Mailing box with gift presentation | E-commerce orders and direct dispatch | Test its protection and opening experience together |
For broader format ideas, review the available custom box options against the product’s weight, shape and fulfilment method.
Plan the internal fit
An insert is often more effective than simply adding extra filler. Depending on the product, consider:
- Folded card inserts for lightweight items
- Die-cut board inserts to hold a product in place
- Compartments for multi-item gift sets
- Sleeves or wraps that separate surfaces prone to scratching
- A cavity that makes lifting the item out simple
- An information card placed where it will not bend or cover the product
If the pack contains food, cosmetics, electrical items, breakables or products for children, confirm the relevant Australian labelling, safety and material requirements for the product category. Packaging design cannot replace product compliance, and requirements should be verified before production.
Check storage and dispatch compatibility
Before approving a structural design, check:
- Whether boxes will be supplied flat or assembled
- The storage area needed for boxes, inserts and filler
- How the box fits inside any outer transit packaging
- Whether a label can be applied to the shipping carton without obscuring gift presentation
- How the product will be protected from moisture, abrasion and compression in transit
- Whether retail staff or fulfilment teams can open, pack and close it without damage
Choosing Premium Paper Box Materials
Paper-based gift packaging can look high-end without relying on one material alone. The right choice depends on the product weight, print design, desired texture, durability requirements and end-of-life considerations.
Compare the board and wrap options
A rigid gift box commonly uses a thicker board structure with a printed or coloured paper wrap. Folding boxes usually use paperboard that can be creased and folded. Both can be suitable, but they create different experiences.
When comparing options, assess:
- Rigidity: Can the pack support the product without bowing, splitting or losing its shape?
- Print suitability: Does the material support the required artwork, fine details and colour coverage?
- Surface finish: Does a matte, gloss, uncoated or textured finish fit the brand and practical use?
- Scuff resistance: Dark solid colours and large inked areas can show marks more readily, particularly during handling.
- Fold and crease performance: Folding cartons need clean creases that do not crack visibly.
- Recyclability considerations: Material combinations, plastic laminations, magnets, foam and mixed substrates may affect how easily components can be separated. Confirm current local disposal guidance before making environmental claims.
Finishes such as embossing, debossing, foil details, spot gloss and textured stocks can add visual value, but use them selectively. They may increase complexity, affect production tolerances or be less suitable for heavily handled surfaces.
Design for realistic print results
Provide production-ready artwork with correct dimensions, bleed, safe areas and dielines once supplied. Avoid assuming that colours viewed on a phone or monitor will match a printed result.
Pay particular attention to:
- Fine reversed-out text on dark backgrounds
- Small metallic or foil details
- Large areas of solid colour
- Artwork that crosses folds, corners or box edges
- Barcode placement and scan clearance where relevant
- The position of seams, wrap joins, magnets, ribbons and closures
Ask for confirmation of the intended substrate, print method, finish and artwork file requirements before releasing final artwork.
Integrating Branded Label Stickers and Tags
Stickers and tags are flexible tools for personalisation, seasonal updates and variable information. They can also reduce the need to redesign an entire printed box when only a product name, batch detail, scent, flavour or campaign message changes.
Use labels or tags where they add a clear function:
- A seal to hold tissue paper or an outer wrap in place
- A product variant label on a standard box
- A gift message or blank area for handwritten notes
- A limited-edition or seasonal identifier
- Care, ingredient, warning or product-use information where appropriate
- A swing tag that adds texture without covering core packaging artwork
For a closer look at formats and finishes, see custom branded stickers.
Choose the adhesive and placement carefully
A visually appealing sticker can still cause problems if it lifts, wrinkles, tears the paper surface or leaves residue. Confirm the label material and adhesive suit the substrate, intended storage conditions and handling.
Test labels on the actual box finish, not only on a spare sheet of paper. This is particularly important for textured papers, uncoated stocks, coated surfaces and boxes that may be exposed to friction or changing temperatures.
Tags need equally practical planning. Confirm hole placement, string or ribbon length, attachment method and whether the tag could catch during packing or transport.
Quality Assurance and Sample Testing
A sample is the most useful checkpoint before a full production run. It lets the team evaluate the combined result: structure, print, finish, inserts, labels, tissue and packing workflow.
Review samples against an agreed checklist rather than relying on general impressions.
Gift packaging sample checklist
Inspect the following:
- Overall dimensions and product fit
- Lid, drawer, flap or magnetic closure alignment
- Corner quality, wrap joins and visible board edges
- Artwork position, colour appearance and readability
- Text accuracy, product details and version control
- Print finish consistency and any foil, embossing or debossing detail
- Insert fit and product stability
- Sticker adhesion and tag attachment
- Tissue, ribbon, filler or wrap compatibility
- Ease of opening and closing
- Appearance after normal handling and packing
- Fit inside the selected outer transit carton, where applicable
Test the packaging in the way it will actually be used. Pack a complete unit, close it, unpack it and repeat the process. Have the people responsible for fulfilment try it as well; they may identify awkward folds, unclear assembly steps or components that are easy to misplace.
Where products are fragile, heavy, temperature-sensitive or regulated, determine what additional testing or verification is appropriate for the product and target market. Do not assume a standard box sample proves suitability for every distribution condition.
Keep an approved reference sample, final artwork files, dielines and component specifications together. This provides a practical benchmark when reordering or coordinating different packaging components.
Sourcing Decorative Fillers and Accents
Decorative filler should support the product, not conceal poor structural fit. It can create a generous opening experience, but it also adds materials, assembly time and possible mess.
Common options include:
- Tissue paper for a soft, layered presentation
- Shredded paper for cushioning and volume
- Paper crinkle cut for a more textured look
- Fabric-style ribbon for a traditional gift finish
- Paper belly bands for a clean, brandable closure
- Printed cards for a message, product story or care information
- Seals and stickers for an economical finishing touch
Choose filler according to product needs. Delicate surfaces may need a barrier layer before loose filler is added. Small products may disappear in deep shred, while heavy items can compress lightweight filler and still move around.
Avoid overfilling. It can make the pack difficult to close, increase packing variability and frustrate the recipient. Establish a repeatable quantity or visual fill line so each box is packed consistently.
If sustainability is part of the brief, review every component together. A recyclable box paired with difficult-to-separate accessories may not deliver the outcome customers expect. Make only environmental statements that can be supported by the actual materials and local disposal pathways.
Calculating All-In Packaging Costs
The true packaging cost is the cost of the complete packed unit, not just the box. Build a cost model before finalising the design, especially if the gift pack contains several components.
Include:
- Primary packaging: Box, insert, wrap, sleeve or tray.
- Printed components: Labels, tags, cards, instructions and belly bands.
- Decorative materials: Tissue, filler, ribbon, seals and protective wraps.
- Set-up and assembly: Time, labour steps and any special tools required.
- Outer protection: Transit carton, void fill and packing tape where the item is dispatched.
- Storage and handling: Space required for flat and assembled components, plus stock management.
- Production allowances: Sampling, artwork updates, wastage planning and minimum-order considerations.
- Change risk: Cost implications if variants, campaign dates or required information change after production.
A lower unit price can be misleading if the packaging takes longer to assemble, needs more manual correction or results in higher breakage risk. Conversely, a more structured insert may add cost but simplify packing and reduce product movement.
Create at least two practical options: a preferred presentation version and a simplified version. Compare them on product protection, assembly time, storage volume, visual effect and ability to adapt across product variants.
When requesting quotes, provide consistent information to every supplier: box style, dimensions, material preference, print colours, finishes, quantities, inserts, accessories, artwork status and delivery format. This makes comparisons far more meaningful.
Setting Up a Streamlined Assembly Process
A gift box should be designed for the people who will pack it, not only for a product photograph. The assembly process needs clear steps, organised components and enough tolerance for normal variation.
Map the packing sequence
Write the process in the exact order the packer will follow. For example:
- Prepare the box and insert.
- Place the protective layer or tissue.
- Add the product and accessories.
- Check the product orientation.
- Add the card, tag or message.
- Apply the seal, ribbon or outer label.
- Complete a final visual and closure check.
- Place the gift box into its outer packaging if it will be dispatched.
Keep frequently used components within easy reach and separate visually similar items to prevent picking mistakes. If the pack has multiple variants, use clear component identification and a final check that matches the correct product to the correct label and insert.
Reduce variability
Small differences in assembly can make gift packaging look inconsistent. Create simple visual work instructions showing:
- The correct quantity of filler
- Product orientation
- Tissue folding method
- Placement of cards and stickers
- Ribbon length and knot position, if used
- How the finished box should look before it is packed
Review the process after the first production batches. If staff are regularly adjusting inserts, re-folding tissue or struggling to close lids, the structural or component design may need refinement.
Final Pre-Production Checklist
Before approving gift packaging for production, confirm that you can answer “yes” to each point:
- Does the packaging reflect the intended brand mood and customer occasion?
- Does the product fit securely with enough clearance for protection?
- Are the box style, material and finish appropriate for handling and storage?
- Have artwork, text, labels and variable product details been checked?
- Have stickers and tags been tested on the final packaging surface?
- Does the decorative filler protect rather than overwhelm the product?
- Has a complete sample been assembled and reviewed?
- Have all packaging components been included in the cost model?
- Can the fulfilment or retail team assemble the pack consistently?
- Have relevant Australian product, labelling and packaging requirements been verified for the product category?
A well-specified brief and tested sample prevent most gift packaging issues before they become expensive production problems. If you are comparing formats, explore custom gift packaging options, then prepare a specification that covers structure, materials, artwork, inserts and assembly—not just the outside of the box.
