
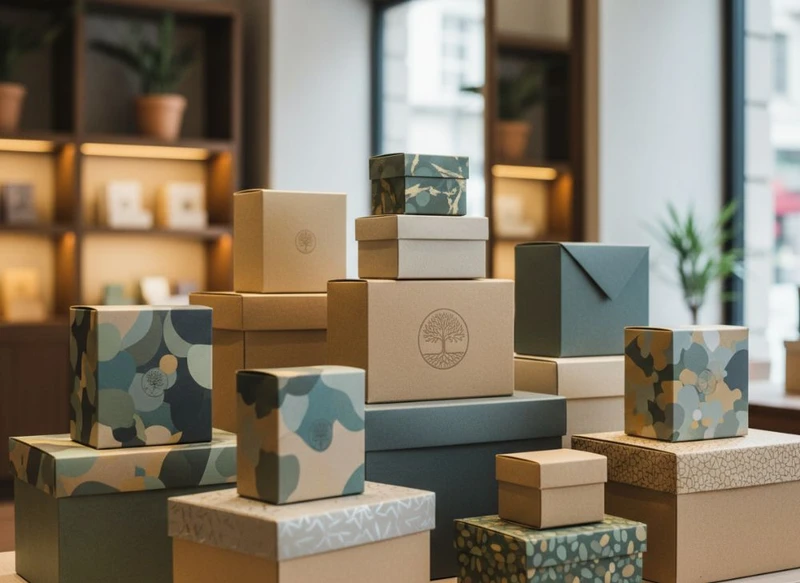
Custom paper box packaging should protect the product, make the brand easy to recognise and suit the way the item is sold, stored and opened. The strongest solution is rarely the most elaborate one: it is the box that balances material strength, print quality, pack-out efficiency and a clear customer experience.
This ultimate guide to custom paper box packaging in 2026 helps Australian businesses compare the main decisions before requesting a quote or approving artwork. Start with the product’s dimensions, weight, fragility and sales channel, then choose a box structure and board that meet those needs before investing in print finishes.
Why Custom Boxes are Essential for Brand Growth
A custom box is a functional part of the product experience, not simply an outer layer. It can distinguish a product on a retail shelf, present an e-commerce order professionally and provide the information customers need before purchase or use.
For growing brands, well-specified packaging can support several practical goals:
- Product protection: A correctly sized box and suitable internal support help limit movement and reduce the chance of crushing, scuffing or breakage.
- Brand recognition: Consistent colours, typography, logos and visual hierarchy make it easier for customers to identify a range.
- Clear communication: Packaging can explain contents, variants, directions, ingredients, care information or disposal guidance where applicable.
- Retail readiness: A box can be designed to hang, stack, face forward or sit securely in a display environment.
- Better unboxing: For online orders and gift products, the opening sequence, internal print and presentation can reinforce the perceived value of the item.
- Range management: Shared box formats with changeable labels, sleeves or colour panels can help brands manage multiple SKUs without redesigning every component.
Customisation does not have to mean a unique structure for every product. A standard carton style with tailored dimensions, branded print and a well-chosen finish may be more practical than a complex die-cut design. The right level of customisation depends on order volume, product risk, campaign length and how much variation the range requires.
For products with multiple flavours, sizes or seasonal editions, custom stickers and labels can be a flexible way to identify variants without changing the full carton artwork each time.
Choosing the Right Paper Stock and Material
Choose material based on the job the box must perform. Appearance matters, but strength, folding behaviour, printing requirements and end-of-life considerations are equally important.
Paperboard and corrugated board are the two broad material categories used for many custom boxes. Paperboard is commonly used for folding cartons, cosmetics, food-adjacent dry goods, stationery and lightweight retail products. Corrugated board has a fluted inner layer and is generally better suited to transport packaging, heavier goods and products requiring more cushioning.
Common paper packaging materials
| Material | Typical strengths | Often suited to | Points to check |
|---|---|---|---|
| SBS or white paperboard | Smooth, bright print surface and clean presentation | Premium retail cartons, beauty, small consumer goods | Board thickness, crease durability and surface finish |
| Kraft paperboard | Natural appearance and strong sustainability cues | Artisan products, dry goods, simple retail packs | Ink coverage, colour shift and whether the natural surface suits the artwork |
| Recycled paperboard | Can support recycled-content goals | Secondary packaging and many retail cartons | Surface consistency, print expectations and required strength |
| Corrugated board | Good rigidity and cushioning potential | Mailers, shipping cartons, larger products | Flute type, compression needs, size and internal fit |
| Rigid board | Substantial feel and premium presentation | Gift boxes, presentation packs, higher-value products | Storage space, assembly, shipping impact and outer wrap options |
The board weight, thickness and construction should be confirmed with the packaging supplier rather than selected from appearance alone. A heavier board is not automatically better. It may improve rigidity, but can also change fold quality, increase material use and affect the way a carton packs flat or assembles.
Match the material to product risk
Use these questions to narrow the choice:
- How heavy is the product? Heavier items may need a stronger board, reinforced base or a corrugated format.
- Is the product fragile? Glass, ceramics and delicate components often need an insert or additional protective packaging, not just a thicker outer box.
- Will the box be posted? Consider compression, vibration, moisture exposure and the need for a secondary shipping carton.
- Will customers handle it repeatedly? Display packaging and reusable gift boxes need durable edges, closures and surfaces.
- Does it need to sit in chilled, humid or other demanding conditions? Confirm that material, adhesive and print choices are compatible with the actual environment.
- Does the pack contain regulated information? Verify all relevant labelling, safety and product-specific requirements for the intended Australian market before printing.
A frequent mistake is treating a retail carton as a shipping box. A printed folding carton may enhance presentation, but it usually needs an outer mailer or transit carton when sent through a delivery network.
Key Design Elements for Impactful Visuals
Effective packaging design starts with hierarchy. A customer should be able to understand the brand, product type, key variant and quantity or size quickly, whether viewing the box online, on a shelf or at arm’s length.
Build the front panel around one clear message
The front panel normally needs only the most important information:
- Brand name or logo
- Product name
- Variant, scent, flavour, colour or format
- A concise benefit or descriptor, where appropriate
- Product image or illustration if it improves understanding
- Net contents or other mandatory information where applicable
Avoid trying to make every panel equally prominent. When logos, claims, product photography, patterns and long copy all compete, the pack can become difficult to scan. Leave enough clear space for the main product name to work.
Design for the finished box, not just the flat artwork
Packaging artwork is applied to a die-line, then cut, creased and folded. Design decisions must account for:
- Panel breaks and fold lines
- Glue areas that should remain free of critical text
- Bleed beyond cut edges
- Safe margins for logos and fine copy
- Barcode placement and readability
- Orientation of side panels and base panels
- The visibility of information once the box is displayed or packed
Request the correct dieline for the chosen box structure before finalising artwork. Do not scale, redraw or alter it unless the packaging provider confirms the change. Even a small structural adjustment can affect folds, glue flaps and product fit.
Colour, typography and finishes
Use brand colours that reproduce reliably in the intended print method and stock. Bright screens can display colours differently from printed ink, particularly on uncoated or kraft substrates. If colour matching is important, discuss the preferred colour system, proofing process and acceptable variation before production.
Typography must remain readable at the intended size. Very thin lettering, tiny reversed-out text and intricate line work can become harder to reproduce on textured stock or across creases.
Finishes should support the design rather than conceal weak hierarchy. Common options include:
- Matte coating: A subdued, contemporary appearance that can reduce glare.
- Gloss coating: A more reflective surface that can make imagery and colour appear more vivid.
- Spot UV: Gloss applied selectively to create contrast on chosen areas.
- Foil stamping: Metallic or coloured foil for logos, borders or highlights.
- Embossing or debossing: Raised or recessed details that add tactile interest.
- Window cut-outs: A way to show the product, provided product protection and shelf-life needs are considered.
Every finish adds production considerations. Ask how it affects recyclability pathways, rub resistance, lead times, minimums and the ability to write or apply labels over the surface.
Printing Techniques: Offset vs. Digital for Boxes
Offset and digital printing can both produce professional custom boxes. The better option depends mainly on run size, artwork complexity, version changes, colour expectations and budget structure.
| Factor | Offset printing | Digital printing |
|---|---|---|
| Best suited to | Established designs and larger production runs | Smaller runs, pilots and variable designs |
| Setup | Requires setup before printing | Lower setup requirements |
| Unit cost pattern | Often becomes more economical as quantities increase | Often practical when quantities are lower |
| Version changes | Changes may involve additional setup | Easier to accommodate multiple versions |
| Colour management | Useful for controlled brand-colour work | Capabilities vary by system and substrate |
| Personalisation | Less suited to individual variation | Can suit variable text, images or short-run versions |
| Turnaround planning | Allow for setup and production stages | Often simpler for short runs, but confirm timing |
Offset printing generally uses plates and is commonly selected for larger quantities or designs where consistent, carefully managed colour is a priority. Digital printing transfers artwork without traditional plates, making it useful for shorter runs, product trials, regional variants or frequently updated packaging.
The comparison is not absolute. The substrate, coverage, finishing requirements, box style and supplier workflow all influence the final result and cost. Request comparable specifications when evaluating quotes. One quote may include a different board, coating, print coverage or assembly method than another.
Before committing, confirm:
- Print method and number of colours
- Whether solid brand colours need special treatment
- Proof format and approval process
- Whether the box is supplied flat or assembled
- Any limits for fine type, gradients, metallic effects or full-coverage ink
- How artwork revisions are handled after approval
Structuring Your Budget for Custom Packaging
A packaging budget should cover the full specification, not only the box unit price. A very low per-unit figure may not reflect setup, tooling, proofing, finishes, packing configuration or freight arrangements.
Main cost drivers
The following factors usually have the greatest effect on packaging cost:
- Box size and material use
Larger boxes and heavier or specialist boards use more material. Oversized packaging also affects storage and transport efficiency.
- Box structure
A simple tuck-end carton is generally less complex than a magnetic rigid box, multi-part presentation box or custom insert system.
- Quantity
Many setup costs are spread across the total run. However, ordering too many boxes can create storage problems and expose the business to obsolete artwork or product changes.
- Printing and ink coverage
Full-coverage designs, multiple colours and complex colour requirements may increase cost compared with a simple one- or two-colour layout.
- Finishes and embellishments
Foil, embossing, specialty coatings, windows and lamination add visual impact but should be assessed against the product’s margin and intended positioning.
- Tooling and sampling
New structural designs may need a cutting form, sample or proof stage. Confirm what is included and whether tools can be reused for repeat orders.
- Packing and assembly
Flat-packed boxes can save space but require assembly. Pre-assembled or hand-finished packaging may suit some applications but can affect cost and storage.
Budget smarter with a specification ladder
Create three versions of the brief before seeking prices:
- Essential: The minimum board, structure and print needed to protect and present the product properly.
- Preferred: The ideal version, including the most valuable brand features.
- Premium: A presentation-led option with higher-end finishes or construction.
This approach identifies which elements genuinely affect the customer experience. For example, a sturdy board and accurate fit may matter more than foil, while a premium gift item may justify a rigid box and tactile finish.
Avoid changing several variables at once when comparing suppliers. Keep dimensions, stock, print coverage, finish and quantity consistent; otherwise, the quotes are not directly comparable.
Paper Box Styles: Which is Best for Your Product?
The best box style depends on how the product is packed, opened, displayed and transported. Start with functionality, then refine the appearance.
Folding cartons
Folding cartons are supplied flat and assembled along pre-creased lines. They are versatile for many lightweight retail products and can be printed across multiple panels.
Common configurations include straight tuck end, reverse tuck end and auto-lock base styles. The closure and base should be selected based on product weight, packing speed and the desired opening experience.
Best for: cosmetics, supplements, candles, small household goods, stationery and many boxed retail items. Check: whether the base supports the product weight and whether the carton requires a seal, label or tamper-evident feature.
Mailer boxes
Mailer boxes are usually self-locking corrugated formats with an integrated lid. They can provide a branded unboxing experience while offering more transit protection than a light folding carton.
Best for: e-commerce orders, subscription packs, clothing, accessories and gift sets. Check: internal clearance, need for void fill, external shipping label space and whether the box will be used as the sole transit pack.
Sleeve boxes
A sleeve slides over an inner tray, carton or product. It can create a premium reveal while using a relatively straightforward construction.
Best for: gift packs, tray-packed products, confectionery-style presentation and product bundles. Check: friction fit, ease of opening, product retention and potential scuffing on high-contact surfaces.
Rigid gift boxes
Rigid boxes use thicker board and are often wrapped with printed or coloured paper. They offer a substantial presentation but occupy more space than flat-packed cartons.
Best for: premium gifts, jewellery, corporate packs and presentation-led products. Check: storage requirements, insert design, closure type and whether the customer is likely to reuse the box.
Explore options for custom gift packaging when the presentation layer is a key part of the product offer.
Display-ready and window boxes
Display-ready boxes can be designed for shelf presentation, while window boxes provide a view of the item inside. Both can support product visibility, but they need careful structural planning.
Best for: products where shape, colour or texture helps sell the item. Check: dust protection, product movement, window material choices, stacking requirements and how the pack appears when partially empty.
For any style, test with the actual product or a dimensionally accurate sample. A box can look correct in a digital mock-up yet prove difficult to fill, close or stack in practice.
Sustainable Packaging Solutions for Modern Brands
Sustainable packaging decisions should focus on material efficiency, appropriate protection and clear disposal considerations rather than broad environmental claims. A package that is too flimsy to protect its contents can create avoidable waste; one that is overbuilt can use more material than necessary.
Useful design approaches include:
- Right-sizing the box to reduce empty space and excess filler.
- Selecting paper-based materials appropriate to the product and sales channel.
- Designing for simple separation of components where multiple materials are necessary.
- Avoiding unnecessary layers, inserts and decorative elements.
- Using one adaptable box size across compatible products where it does not compromise fit.
- Considering recycled-content or responsibly sourced material options, subject to supplier confirmation.
- Using clear, accurate disposal instructions only when they can be supported for the specific package components.
Some coatings, laminations, foils, adhesives, windows and mixed-material components may affect local recycling outcomes. Do not assume that a paper-based box is recyclable in every form or location. Ask the supplier for material details, then verify claims and disposal language against the packaging’s final construction and the requirements relevant to your market.
“Compostable”, “biodegradable”, “plastic-free” and similar claims require particular care. They can be misleading when they do not reflect the complete package, available disposal systems or practical conditions needed for breakdown. Keep environmental statements specific, evidence-based and proportionate.
How to Order Custom Paper Boxes: A Step-by-Step Guide
A clear brief reduces redesigns, delays and mismatched quotes. Use this process whether you are ordering a first run or reviewing an existing package.
1. Define the product and use case
Record the product’s exact dimensions, weight, orientation and fragility. State whether it will be sold in retail, online, as a gift, or through a combination of channels. Include any inserts, accessories or protective wrap that must fit inside.
2. Select the structural direction
Choose the preferred box type, opening style and whether it needs an insert, divider, window, handle or tamper feature. Identify what is essential versus optional.
Review available custom box packaging options to compare structures before finalising the brief.
3. Specify materials and visual priorities
Set out the preferred board appearance, strength requirements, print coverage, brand colours and finishes. If sustainability is a priority, describe the outcome you want rather than assuming a particular material solves every issue.
4. Prepare production-ready artwork
Work from the approved dieline. Supply logos, images and graphics in suitable formats, and check that copy, barcodes, legal statements and product data are final. Keep a version-control process so the approved artwork is unambiguous.
5. Request comparable quotes
Provide the same specification to each supplier: quantity, dimensions, box style, board, print, finishes, packing format and delivery destination. Ask what is included, what is optional and what must be confirmed before production.
6. Review a proof or sample
Check spelling, panel placement, colour expectations, folds, closure alignment and barcode positioning. If possible, pack the actual product to assess fit, ease of assembly and customer opening experience.
7. Approve only after final checks
Confirm the approved artwork version, quantities, construction, material, finishing and commercial terms. Make sure the business has internally reviewed product claims, mandatory information and market-specific compliance obligations before release.
8. Plan for future reorders
Keep a record of the final dieline, artwork, material details and approved sample notes. This makes range extensions and repeat orders easier to manage while reducing the risk of accidental specification changes.
FAQ
Should a custom box be printed inside and outside?
Not necessarily. Exterior printing usually delivers the greatest visibility. Internal print can add value for gift packaging, e-commerce unboxing or instructions revealed on opening, but it increases artwork and production complexity. Use it where it contributes to the experience or communication.
What is the difference between a carton and a mailer box?
A carton is commonly a folding paperboard box designed for product presentation. A mailer box is generally a sturdier, self-locking format intended to protect products during dispatch. Some products use both: a printed carton inside a plain or branded mailer.
How much extra space should be left inside a box?
Leave enough clearance for easy packing and any protective material, but avoid excessive movement. The correct allowance varies with the product shape, insert design and whether the box is manually or mechanically packed. Test the intended configuration before production.
Can one box design work for several product variants?
Yes. A shared structural format can work across a range when product dimensions are compatible. Variant details can be changed through artwork, colour blocks, sleeves or labels. Confirm that each variant remains clearly identifiable and that all required information is correct.
A well-planned custom paper box begins with a practical brief, not a decorative concept. Define the protection requirement, choose a structure and material that suit the product, then invest in print and finishes that strengthen the brand. For background on XGolden Print’s packaging capability and experience, visit the company profile.
