
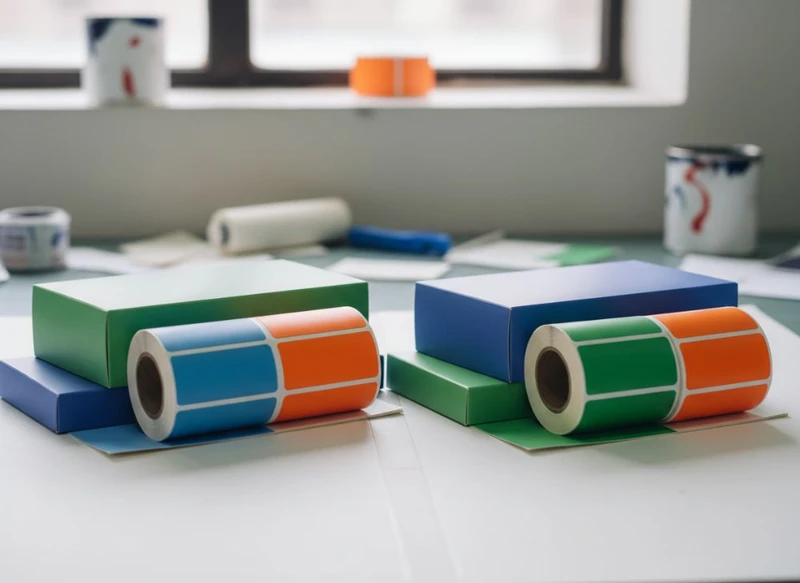
Printing faults in paper boxes and label stickers usually begin before production: the artwork is built to the wrong dieline, colours are not defined consistently, small details are too fine, or the chosen stock and adhesive do not suit the product or surface.
The most reliable fix is to review the design, material and finishing requirements as one specification. Check a physical proof or production sample where available, confirm the printer’s dieline and file requirements, and inspect finished goods against an agreed checklist before accepting the full delivery.
Avoiding Colour Shifts and Inconsistency (CMYK vs. Pantone)
Colour shifts are among the most visible packaging printing problems. A colour that appears bright on screen can print duller, darker or differently hued because screens use RGB light, while most commercial print uses CMYK inks. Paper colour, coating, ink coverage and finishing also influence the final result.
Choose CMYK for full-colour artwork
CMYK is generally appropriate for photographs, gradients and artwork containing many colours. It builds colour from cyan, magenta, yellow and black inks. It is flexible, but it has limits: not every RGB screen colour can be reproduced in CMYK.
To reduce surprises:
- Design in CMYK rather than converting at the last minute.
- Use the colour profile requested by the printer.
- Avoid judging final colour from an uncalibrated monitor.
- Keep linked images high resolution and prepared for print.
- Ask whether the selected uncoated, coated or coloured board will alter the appearance of ink.
Large solid areas can be especially sensitive. Very dark colours, for example, may need a carefully specified rich black build rather than a default black value. Confirm the preferred ink build with the printer, as suitable settings vary by printing process and stock.
Use Pantone or spot colours when colour matching matters
Pantone and other spot-colour systems use a defined ink rather than a four-colour CMYK simulation. They can be useful when a brand depends on a recognisable signature colour, when matching a logo across packaging formats, or when a special metallic or fluorescent effect is required.
However, a Pantone reference does not remove all variability. The same ink may look different on gloss-coated board, uncoated paper and textured material. A varnish, laminate or foil finish can also change how viewers perceive the colour.
| Requirement | CMYK may suit | Spot colour may suit |
|---|---|---|
| Product photography | Yes | Usually unnecessary |
| Multi-colour illustrations | Yes | Usually unnecessary |
| Consistent brand logo colour | Sometimes | Often worth considering |
| Metallic or fluorescent effect | Limited | May be appropriate |
| Short, straightforward artwork | Often | Depends on the design |
| Colour matching across materials | Needs careful proofing | Needs careful proofing |
Keep colour references in the artwork and written job specification. State whether a brand colour is a CMYK conversion, a named spot colour, or a colour that must be visually matched to an approved sample. Do not assume that a hex code is sufficient for print.
Dealing with Bleed and Safe Zones in Box Artwork
Bleed and safe zones protect artwork when sheets are trimmed, cut and folded. Without them, a small amount of normal cutting movement can leave an unintended white edge, clip text or place a logo too close to a fold.
Add bleed beyond every cut edge
Bleed is extra background image or colour extending past the finished cut line. The printer’s dieline should state the bleed allowance required for the job. Do not use a generic value without checking: the appropriate allowance can vary with the box style, print method and converting process.
If a background reaches an edge:
- Extend the background, photograph or pattern through the bleed area.
- Do not place key elements in the bleed.
- Make sure every outer cut edge has the required extension.
- Check tabs, handles, windows and unusual contours individually.
A common mistake is adding bleed around the outside of the artboard but not around internal cut-outs or shaped edges. Follow the printer-provided dieline rather than relying on a simple rectangle.
Keep critical content inside the safe zone
The safe zone is an inward margin from cut lines, creases, perforations and glue areas. Keep logos, legal copy, barcodes, QR codes and fine borders clear of these areas.
On boxes, the safe zone needs to account for more than trimming. Copy too close to a crease can distort when folded, while artwork across a glued seam can be hidden or become difficult to read. A wraparound design may look continuous on a flat layout but break visually at corners once assembled.
Before approving artwork, check:
- Which panels will be visible when the box is closed and displayed.
- Where the glue flap and closure flaps sit.
- Whether text crosses a fold, score or perforation.
- Whether windows, hang tabs or cut-outs interrupt important graphics.
- Whether barcode quiet zones remain clear of nearby artwork.
Use the printer’s latest dieline and keep it on a separate, non-printing layer unless instructed otherwise. Scaling a dieline, redrawing it manually or using one from a previous supplier can cause fit and alignment problems.
Preventing Sticker Lifting and Adhesion Issues
Sticker lifting, curling and falling away are rarely solved by artwork changes alone. Adhesion depends on the combination of label face stock, adhesive, application surface, product conditions and handling.
The first question is not “Which sticker material looks best?” It is “What must the label stick to, and in what conditions?”
Match the adhesive to the application
A label applied to a clean, smooth cardboard carton has different needs from one applied to a curved glass jar, flexible pouch, chilled container or textured paper surface. Adhesives may be permanent, removable, repositionable or designed for particular environments. Confirm the intended use with the supplier rather than assuming one adhesive works everywhere.
Key details to specify include:
- The surface material: paperboard, glass, plastic, metal or another substrate.
- Whether the surface is smooth, coated, textured, recycled, curved or flexible.
- Whether labels are applied by hand or by machine.
- Expected storage and use conditions, including moisture, heat or cold.
- Whether the label must remain attached after opening, handling or refrigeration.
- Whether removability or clean removal is required.
A label can also fail because the surface is dusty, oily, damp or uneven. Even a suitable adhesive may struggle if it is applied to condensation, a powder-coated surface, or a surface treated with a release coating.
Allow time and test the real application
Pressure-sensitive labels generally need firm, even application. Applying a label over an edge, deep curve or sharp corner increases the chance of lifting. Ensure the label shape, material stiffness and container geometry work together.
Practical steps include:
- Apply labels to a clean, dry surface.
- Avoid touching the adhesive with fingers during application.
- Use adequate pressure across the full label, especially at edges.
- Avoid applying labels over seams, embossing or deep texture where possible.
- Test the actual label on the final product surface before committing to a large run.
For product labels where appearance and performance both matter, discuss material and adhesive options before finalising the artwork. A custom sticker format can be specified around the package, application method and intended environment, rather than selected only by finish.
Paper Box Creasing and Folding Problems
Creases and folds determine whether a paper box assembles neatly, protects the product and presents the artwork as intended. Cracking on folds, uneven panels and poorly aligned closures can result from unsuitable board, an incorrect crease setup, artwork placed over fold lines, or a box structure that is too demanding for the chosen material.
Understand common fold defects
Cracking along a crease can expose the board beneath a dark ink layer or coating. It is more noticeable on heavily inked areas, darker colours and some coatings.
Bulging or spring-back can make a carton resist staying closed. This may occur when the board is too stiff for the structure, the folds are not properly formed, or the design has very tight folds.
Uneven creases can make printed panels look crooked or shift graphics near a fold. This is particularly obvious with rules, borders and patterns intended to align across panels.
Tearing at folds may suggest that the stock, grain direction, score setup or structural design needs review.
Design with folds in mind
Avoid placing thin rules exactly on a crease. A line that looks centred on the flat dieline can appear broken once the box is folded. Move key visual elements away from folds where the design allows.
For box artwork, confirm:
- The board type and approximate thickness suitable for the structure.
- Which direction the material grain should run where this is relevant.
- The locations of scores, folds, cuts, perforations and glue areas.
- Whether the design contains heavy ink coverage over folds.
- Whether any laminated, varnished or speciality finish will affect folding.
- Whether the box will be supplied flat, pre-glued or assembled.
An attractive flat design does not always become a practical box. Assemble a plain structural mock-up early to check product fit, opening action, flap clearances and display orientation. This is especially useful for custom printed boxes with inserts, locking tabs, windows or multiple panels.
Quality Control Checklist for Print Deliveries
A quality check is more useful when it compares the delivery against an agreed specification, not a vague expectation of “good print”. Record key requirements before production so that the receiving team knows what to inspect.
Check the first samples and the finished delivery
Use a representative sample from different parts of the delivery where practical. Do not inspect only the top carton or a single label roll.
Artwork and print
- Correct product name, variant, copy and contact details.
- Correct version of the artwork and dieline.
- Logos, images and text are complete and legible.
- Brand colours are reasonably consistent with the approved reference.
- No visible unwanted streaking, smudging, marks or missing print.
- Variable information, if any, is accurate and readable.
Cutting and construction
- Die-cut shape matches the approved layout.
- Box panels, flaps and tabs align when assembled.
- Creases are clean and folds do not crack excessively for the agreed material.
- Glue areas are positioned correctly and do not cover important print.
- Labels peel and apply cleanly without obvious edge damage.
Functional checks
- The product fits the box, insert or sleeve as intended.
- Barcodes and QR codes scan in the intended use condition.
- Sticker size and shape fit the intended application surface.
- Labels stay flat after application for an appropriate evaluation period.
- Quantity, pack configuration and product variants match the order documentation.
Where packaging has safety, food-contact, labelling, recycling, ingredient, warning or other regulated content, verify current Australian requirements with a suitably qualified source. A print supplier can work from approved artwork and specifications, but the brand owner should ensure the claims and mandatory information are correct for the product category.
Ensuring Sharp Detail on Small Label Graphics
Small labels place a lot of information into a limited area. Fine text, thin lines, reverse type and miniature symbols can soften, fill in or become difficult to read after printing and finishing.
The solution is often to simplify, not merely to increase resolution.
Design for the final physical size
Inspect artwork at 100% of the actual label size. A logo that looks crisp when enlarged on screen may be unreadable on a small bottle label or seal sticker.
To improve small-format legibility:
- Use a clear typeface with open letterforms.
- Increase type size where the available space permits.
- Avoid extremely light font weights.
- Use sufficient contrast between text and its background.
- Avoid reversing tiny type out of dark or textured backgrounds.
- Keep fine lines away from the limits of the printing process.
- Simplify small icons rather than shrinking complex artwork.
- Leave clear space around barcodes and QR codes.
Raster images need enough effective resolution at final size. Enlarging a low-resolution image does not create detail; it generally produces softness or visible pixelation. Vector logos, line art and text remain the preferred format for sharp scalable graphics.
Foils, embossing, textured stocks and laminates can add visual interest, but they may be unsuitable for very fine detail. Discuss minimum practical line widths, type sizes and spacing for the selected finish before locking the design.
Correcting Misalignment on Die-Cut Stickers
Misalignment happens when the printed design does not sit correctly within the die-cut sticker shape. It can make a border look uneven, cut through a logo, or leave inconsistent margins around a circular or custom-shaped label.
Some degree of production tolerance is normal, so designs should not depend on perfect edge-to-print registration.
Build tolerance into the artwork
The best prevention is to avoid features that reveal tiny shifts. A thin border running close to the sticker edge is particularly risky because even a small movement will look uneven.
Instead:
- Use a borderless background that extends into the required bleed.
- Keep logos and text comfortably inside the safe zone.
- Make internal outlines thicker and further from the cut edge.
- Use intentional asymmetry where appropriate rather than a hairline frame.
- Request the exact die-cut outline and label orientation.
- Check whether the label is supplied on sheets, rolls or another format, as orientation can affect application.
If an edge border is essential to the brand design, make it more generous and seek printer guidance on achievable registration for the chosen shape and process. Do not assume a design that worked on a rectangular paper label will translate cleanly to a small contour-cut sticker.
For labels applied by machine, also confirm roll direction, unwind orientation, gap or pitch, core requirements and any application tolerances. These are operational specifications, not decorative details, and should be agreed before production.
Preparing Press-Ready Files: A Technical Guide
A press-ready file gives the printer a clear, usable version of the approved design. Exact requirements vary, so always follow the supplied file guide and dieline. In general, a production-ready file should be organised, correctly sized and free from avoidable ambiguity.
Use this preflight checklist
- Start with the current dieline
Use the dieline supplied for the exact box or sticker format. Keep cut, crease, perforation, glue and non-print areas visible for checking but on clearly named non-printing layers where required.
- Set the document to finished size
Do not resize artwork after positioning it on the dieline. Confirm scale is 100% and that all panels correspond with the approved dimensions.
- Add the specified bleed and safe margins
Extend background artwork through every required bleed area. Keep essential content inside the designated safe zone and away from folds, cuts and glue flaps.
- Prepare colours correctly
Use CMYK or named spot colours according to the printing specification. Remove unintended RGB colours, duplicate swatches and unnecessary colour conversions.
- Check images and graphics
Use adequate effective image resolution at final size. Supply logos and line art as vectors where possible. Make sure text, rules and barcodes remain sharp and correctly placed.
- Review overprint, transparency and black settings
Unintended overprint can make elements disappear or change colour. Transparency, blending modes and rich black settings should be checked in a final exported proof. Follow the printer’s advice for the selected process.
- Outline or package fonts as requested
Font handling requirements vary. If fonts remain live, provide them only if requested and licensed for sharing. If outlining text, keep an editable working file separately in case future changes are needed.
- Export the requested PDF format
Use the printer’s preferred PDF preset rather than a generic web or screen export. Include crop marks only when requested; unnecessary marks can complicate imposed packaging files.
- Inspect the final PDF, not only the design file
Open the exported PDF and check panel order, spelling, images, spot colours, bleed, layers and dieline placement. View it at both 100% and a reduced size to identify layout issues.
- Retain a version-controlled master file
Name files clearly and retain the approved source artwork, final production PDF and proof record. This helps prevent an old design, ingredient panel or barcode being reused accidentally.
Final checks before ordering boxes or labels
The strongest packaging outcomes come from treating artwork, structure and material as connected decisions. Confirm the dieline before designing, choose colours for the actual substrate, leave tolerance around cuts and folds, and test labels on the real application surface.
For presentation-focused products, reviewing gift packaging options alongside the product dimensions and opening experience can help identify structural issues early. If you are comparing a packaging supplier, provide a clear brief that includes the finished size, quantity, board or label preference, finish, artwork status and intended use conditions.
XGolden Print can assist with custom packaging and printed label requirements; its company overview provides further background. Bring the preflight checklist and an approved artwork file to the discussion so specifications can be confirmed before production.
